
前言
本篇将介绍图形调试工具pix,使用该工具可以对图形管线进行debug。貌似VS不再支持D3D12的图形调试,笔者的VS无法捕获帧
环境搭建
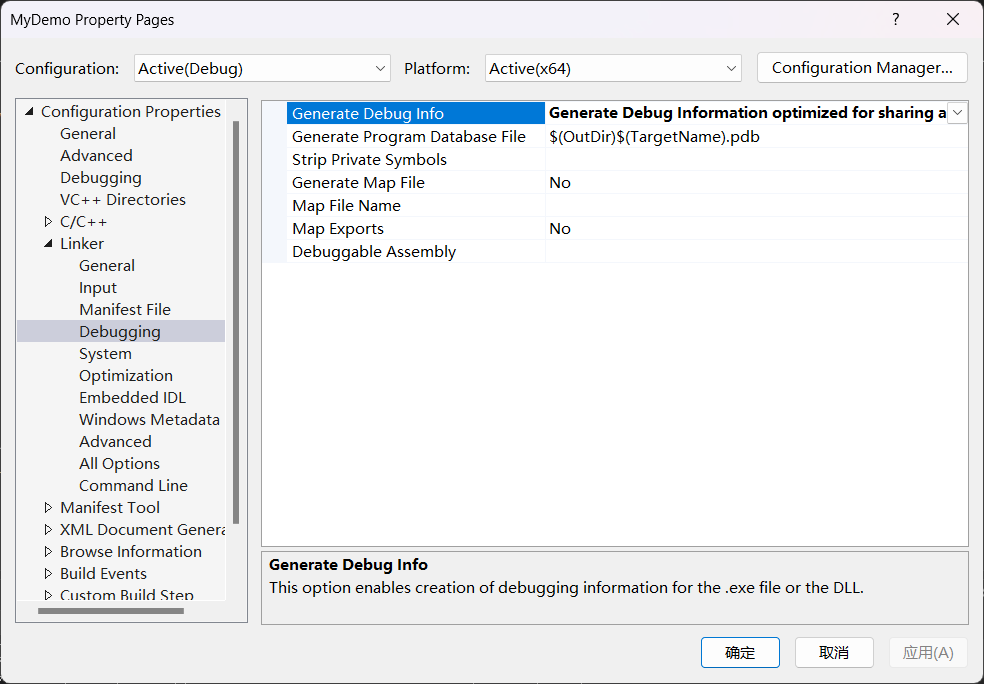
配置用于 CPU 捕获的 PDB
-
生成完整的 PDB
-
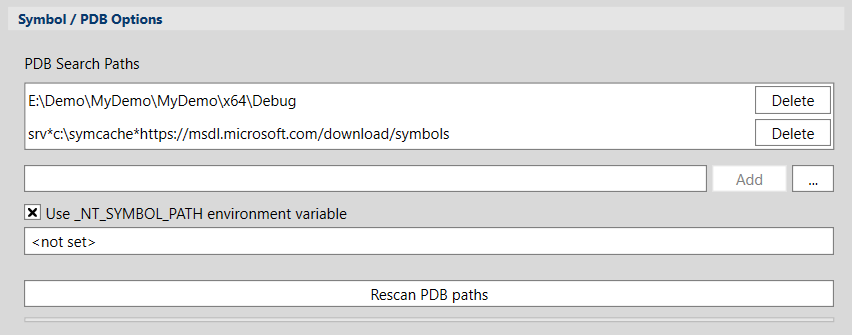
设置符号路径
srvc:symcachehttps://msdl.microsoft.com/download/symbols
using pix3.h
pix3.h包含在 WinPixEventRuntime,在这里我们使用VS加载WinPixEventRuntime。步骤如下
-
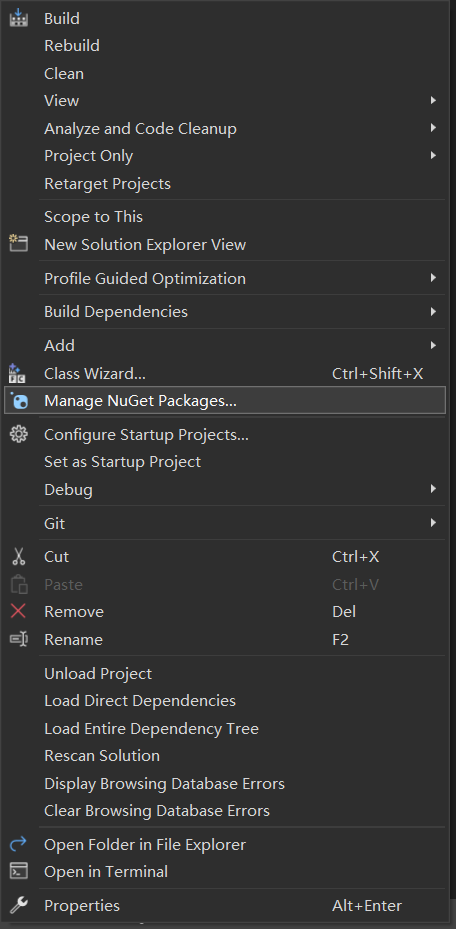
右击解决方案,再点击"Manage NuGet Packages"
-
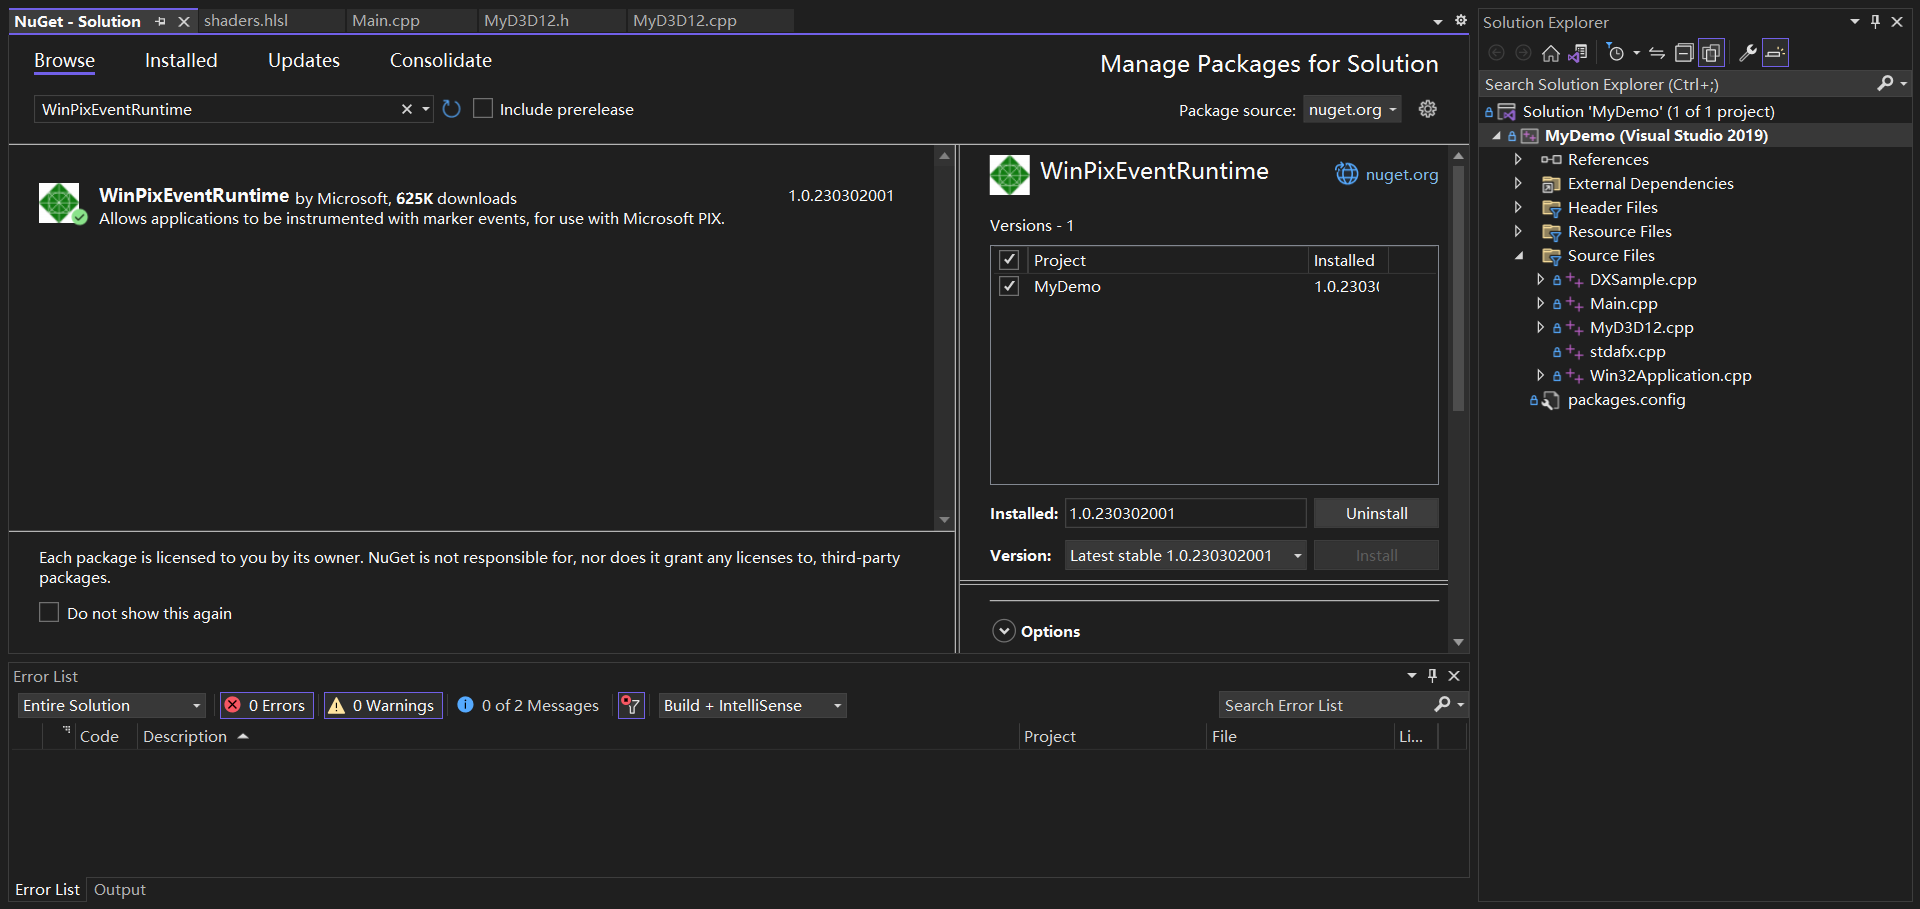
点击"Browse",搜索"WinPixEventRuntime",点击"Install"
-
在build中定义以下预处理器符号之一:
USE_PIX, DBG, _DEBUG, PROFILE, or PROFILE_BUILD -
#inlcude"pix3.h" -
在创建 D3D 设备前,需要将 WinPixGpuCapturer.dll 的副本加载到应用程序的进程中。而"pix3.h"包含一个辅助函数
PIXLoadLatestWinPixGpuCapturerLibrary(),该函数会找到该库并加载它。使用方式如下://find path to WinPixGpuCapturer.dll from the most-recently installed version of PIX static std::wstring GetLatestWinPixGpuCapturerPath_Cpp17() { LPWSTR programFilesPath = nullptr; SHGetKnownFolderPath(FOLDERID_ProgramFiles, KF_FLAG_DEFAULT, NULL, &programFilesPath); std::filesystem::path pixInstallationPath = programFilesPath; pixInstallationPath /= "Microsoft PIX"; std::wstring newestVersionFound; for (auto const& directory_entry : std::filesystem::directory_iterator(pixInstallationPath)) { if (directory_entry.is_directory()) { if (newestVersionFound.empty() || newestVersionFound < directory_entry.path().filename().c_str()) { newestVersionFound = directory_entry.path().filename().c_str(); } } } if (newestVersionFound.empty()) { // TODO: Error, no PIX installation found } return pixInstallationPath / newestVersionFound / L"WinPixGpuCapturer.dll"; }
GPU capture
更多细节可以参考这篇文章GPU Captures - PIX on Windows (microsoft.com)
运行了.exe文件后即可绑定该运行程序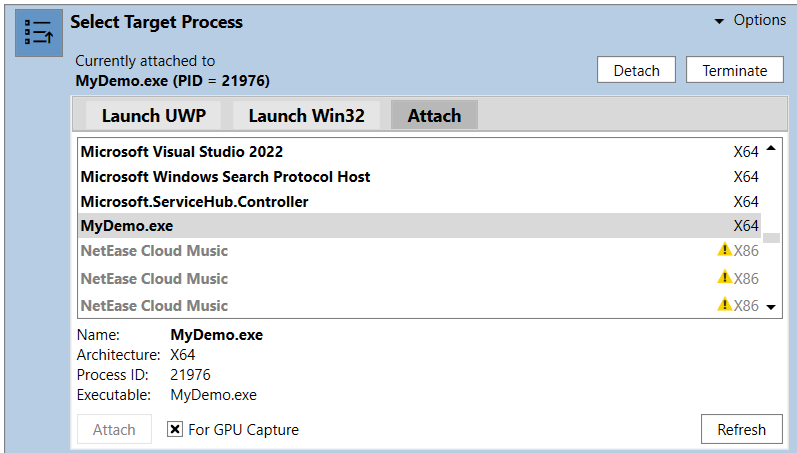
随后点击该相机按钮会生成一张帧画面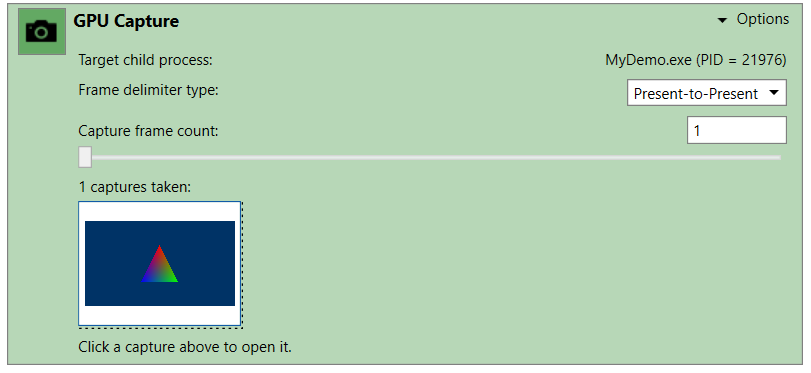
单击该结果图,会跳转到如下界面,默认情况下该界面只显示与呈现工作相关的event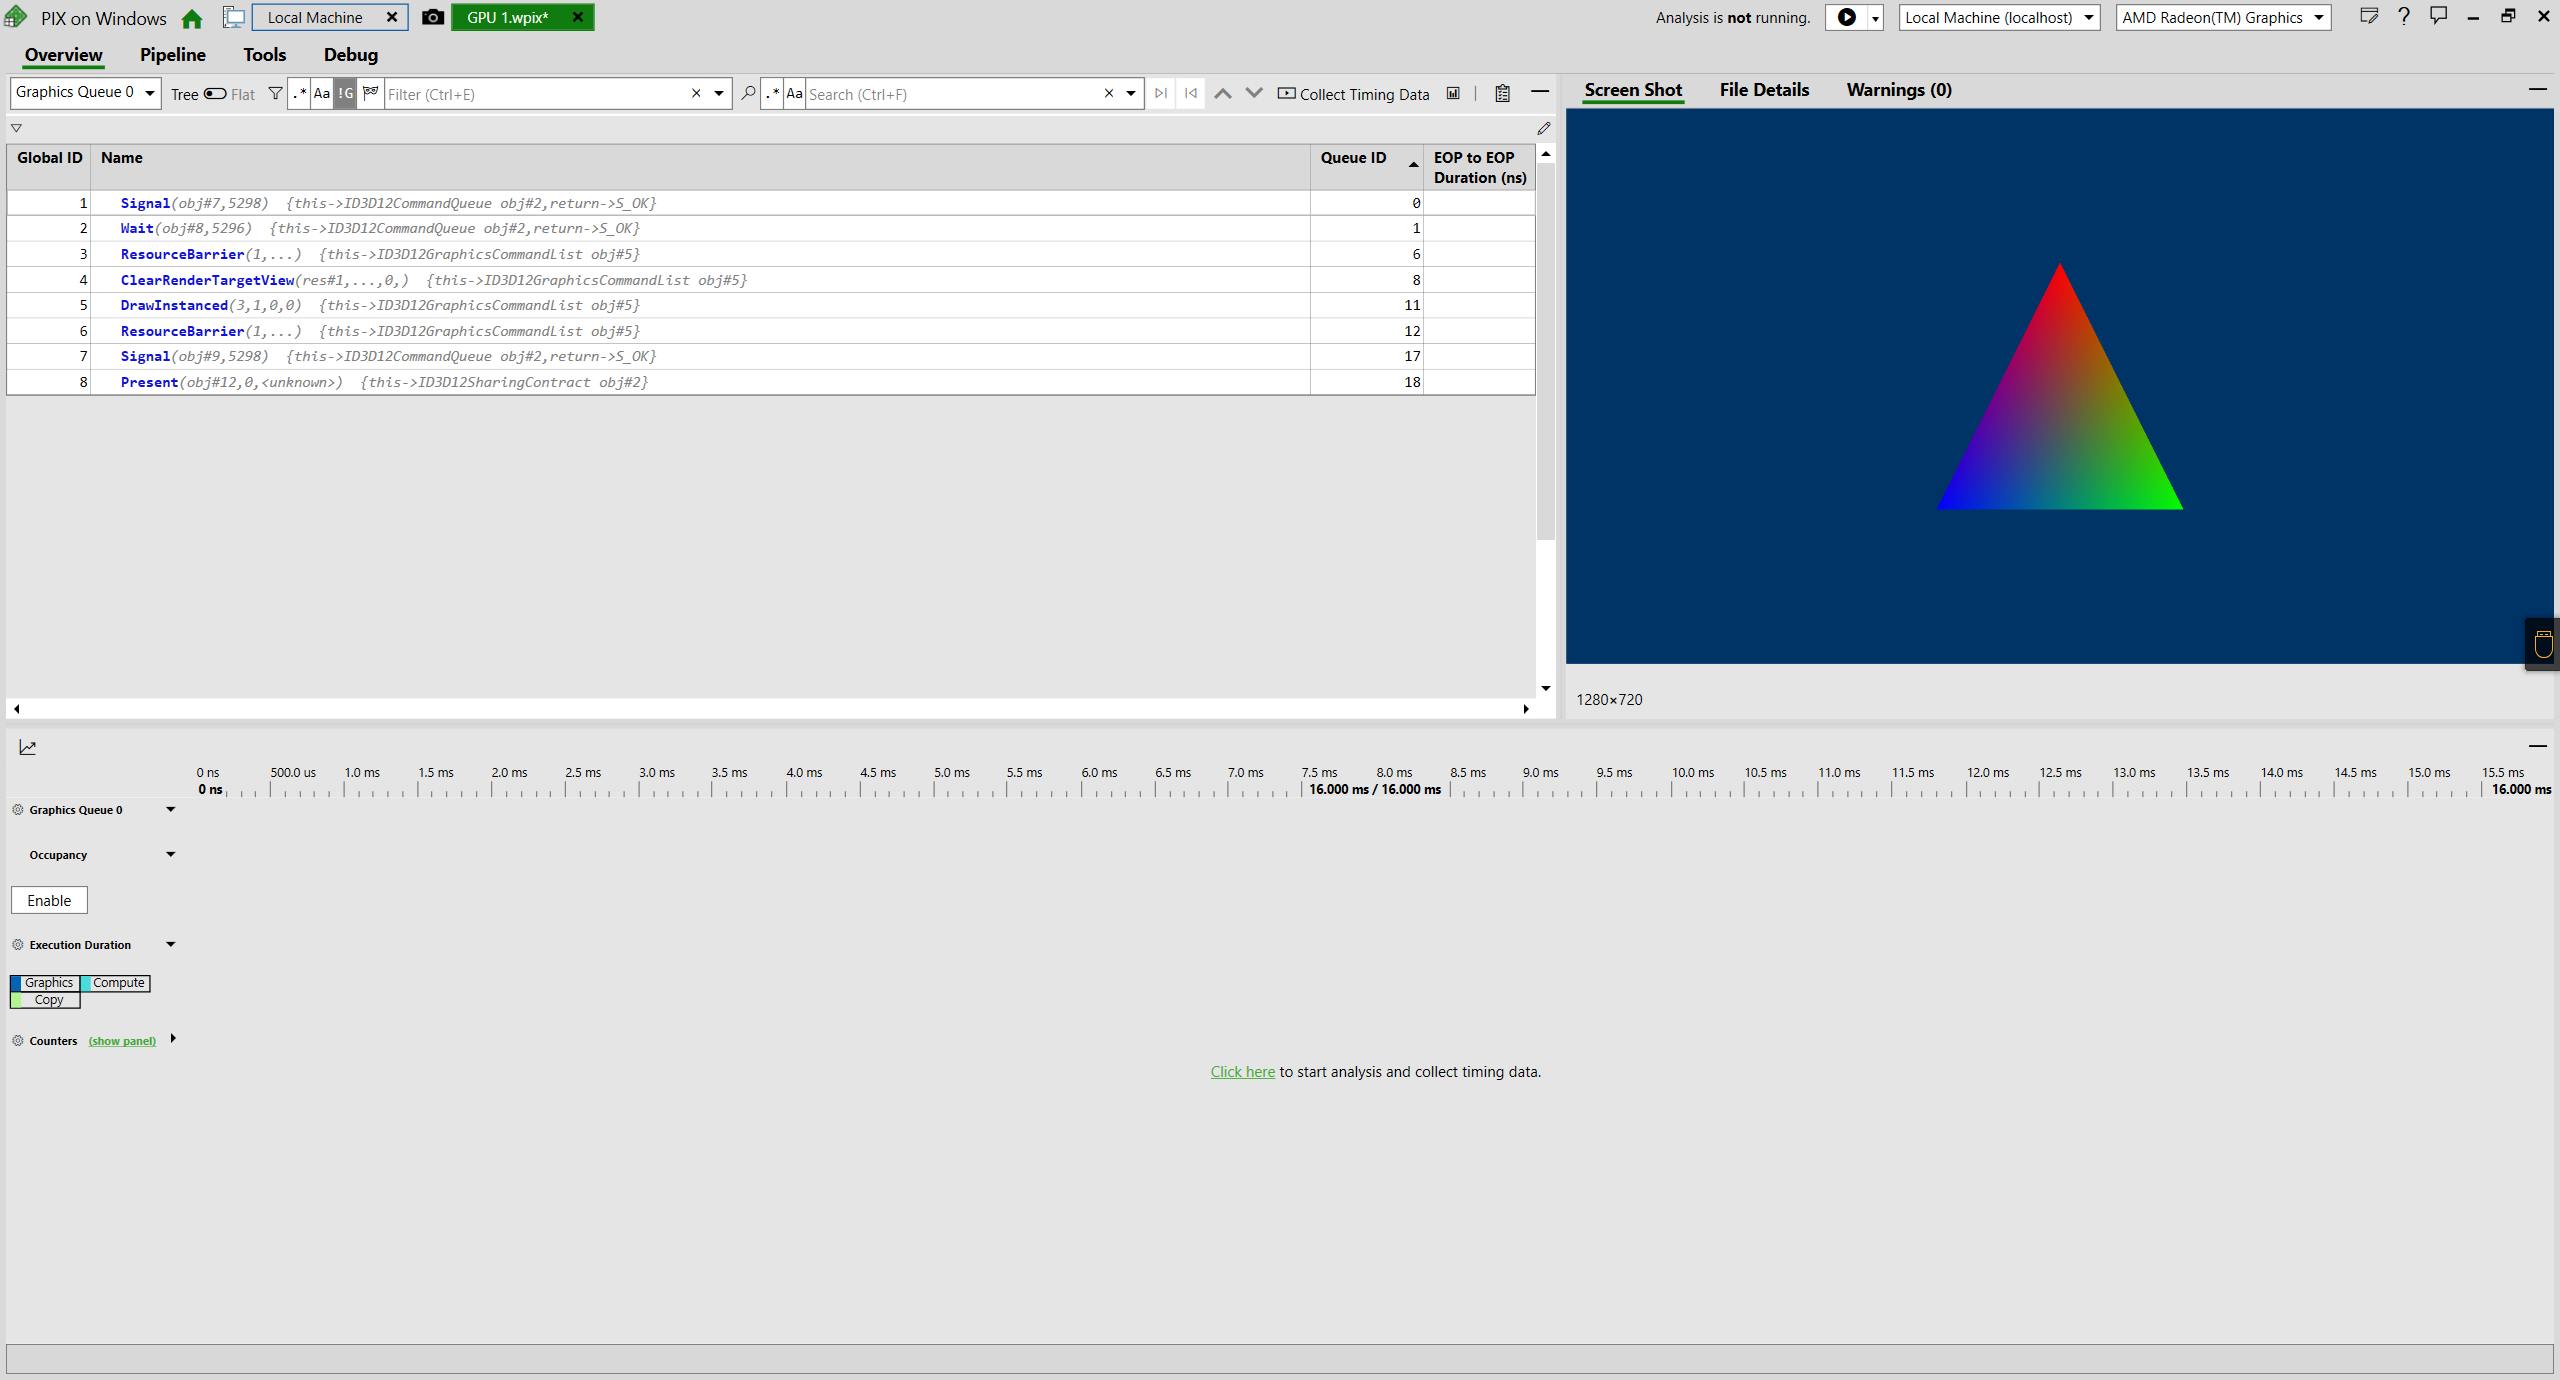
点击左侧的"Enable",将显示GPU占用率
在pipeline中,可以查看哪些资源绑定到管道、着色器代码、输入、输出和当前绑定的 rendertarget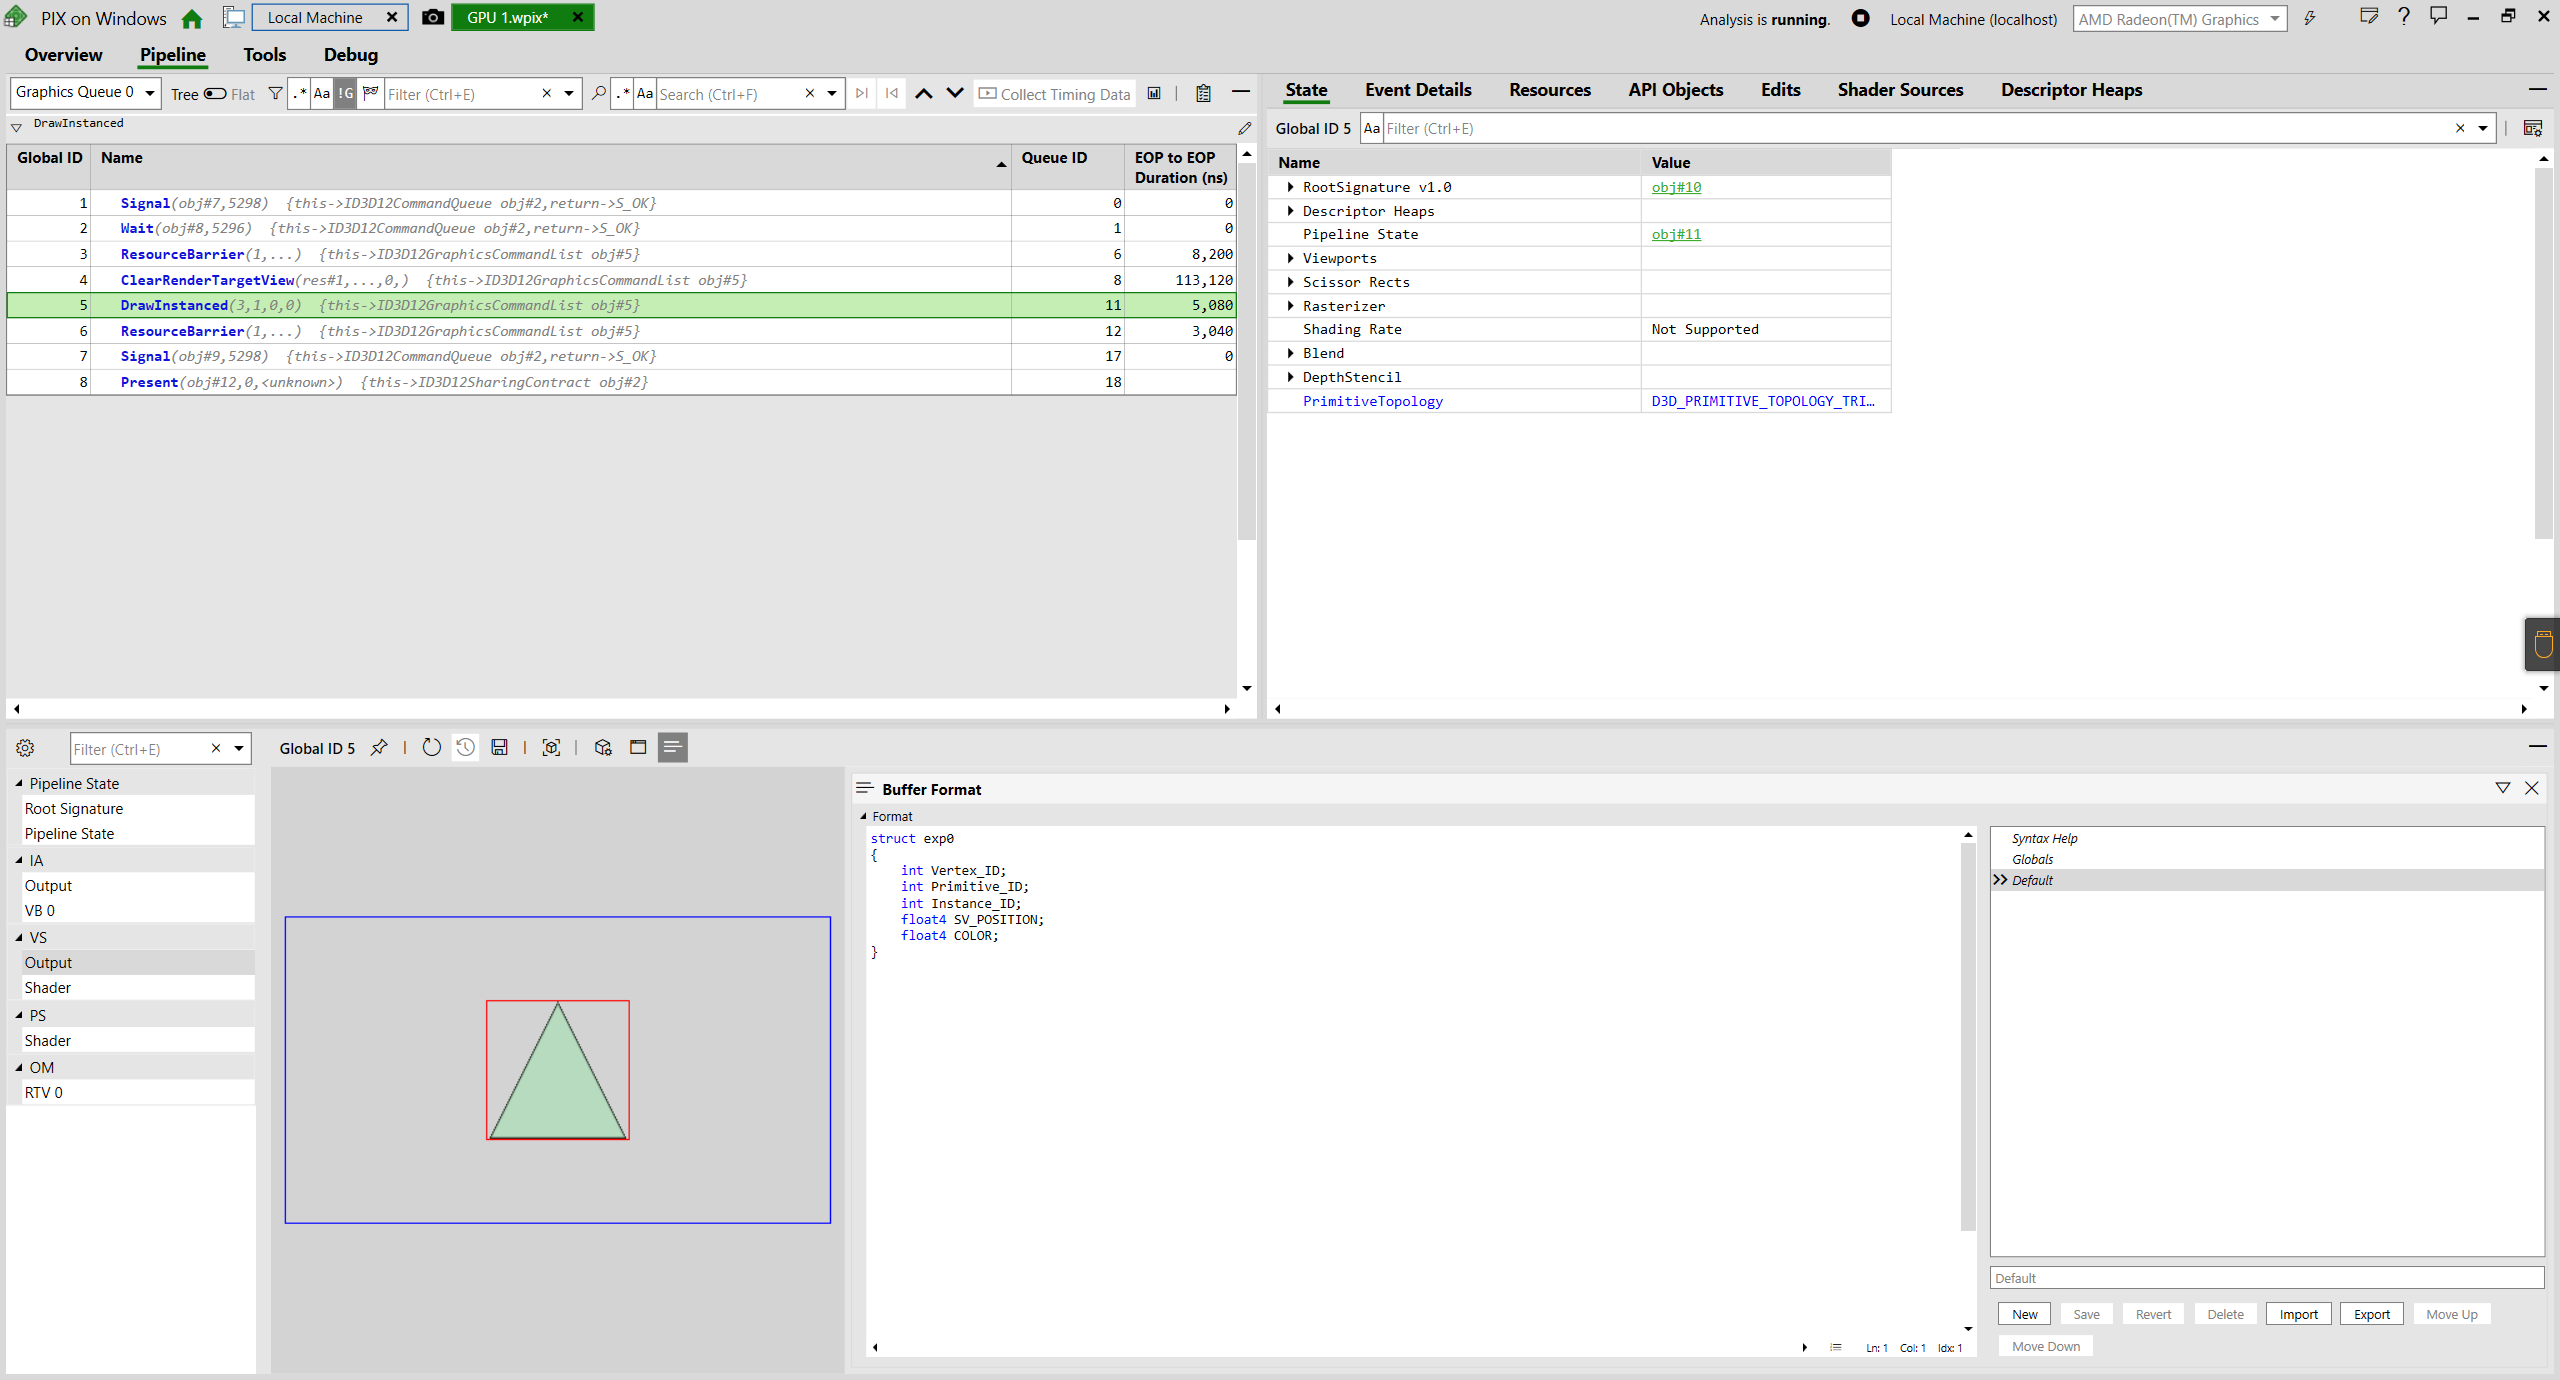
查看顶点缓冲区中对象当前的值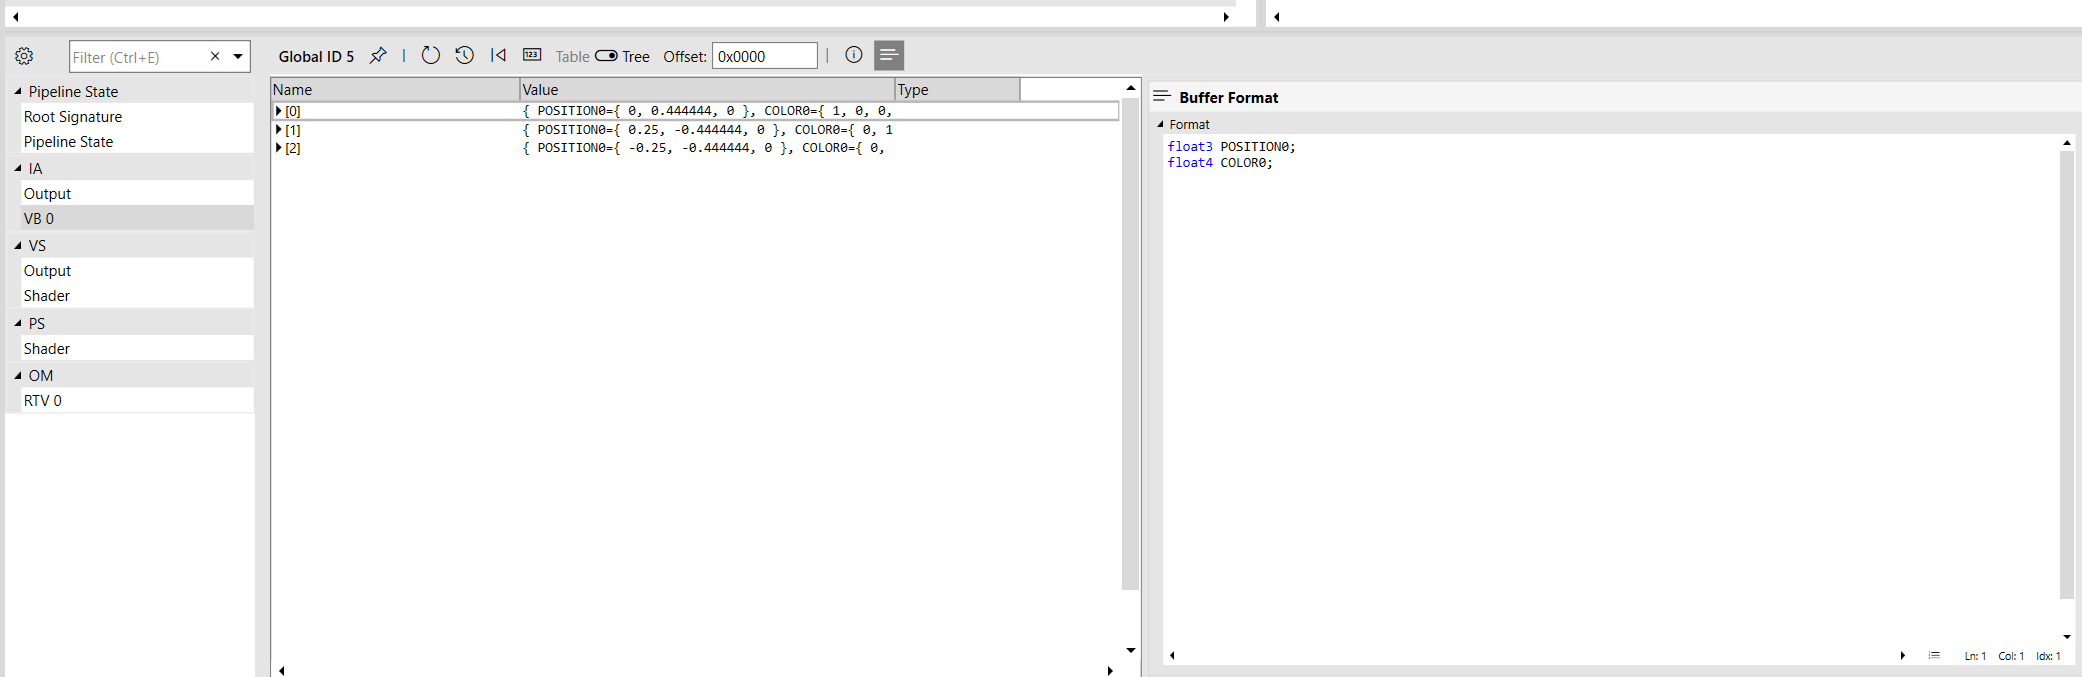
debug shader.对于PS,点击上图中左下角的"RTV 0",再点击"Debug Pixel";对于VS,需要点击"VS"中的"Output",再右击顶点,随后Debug即可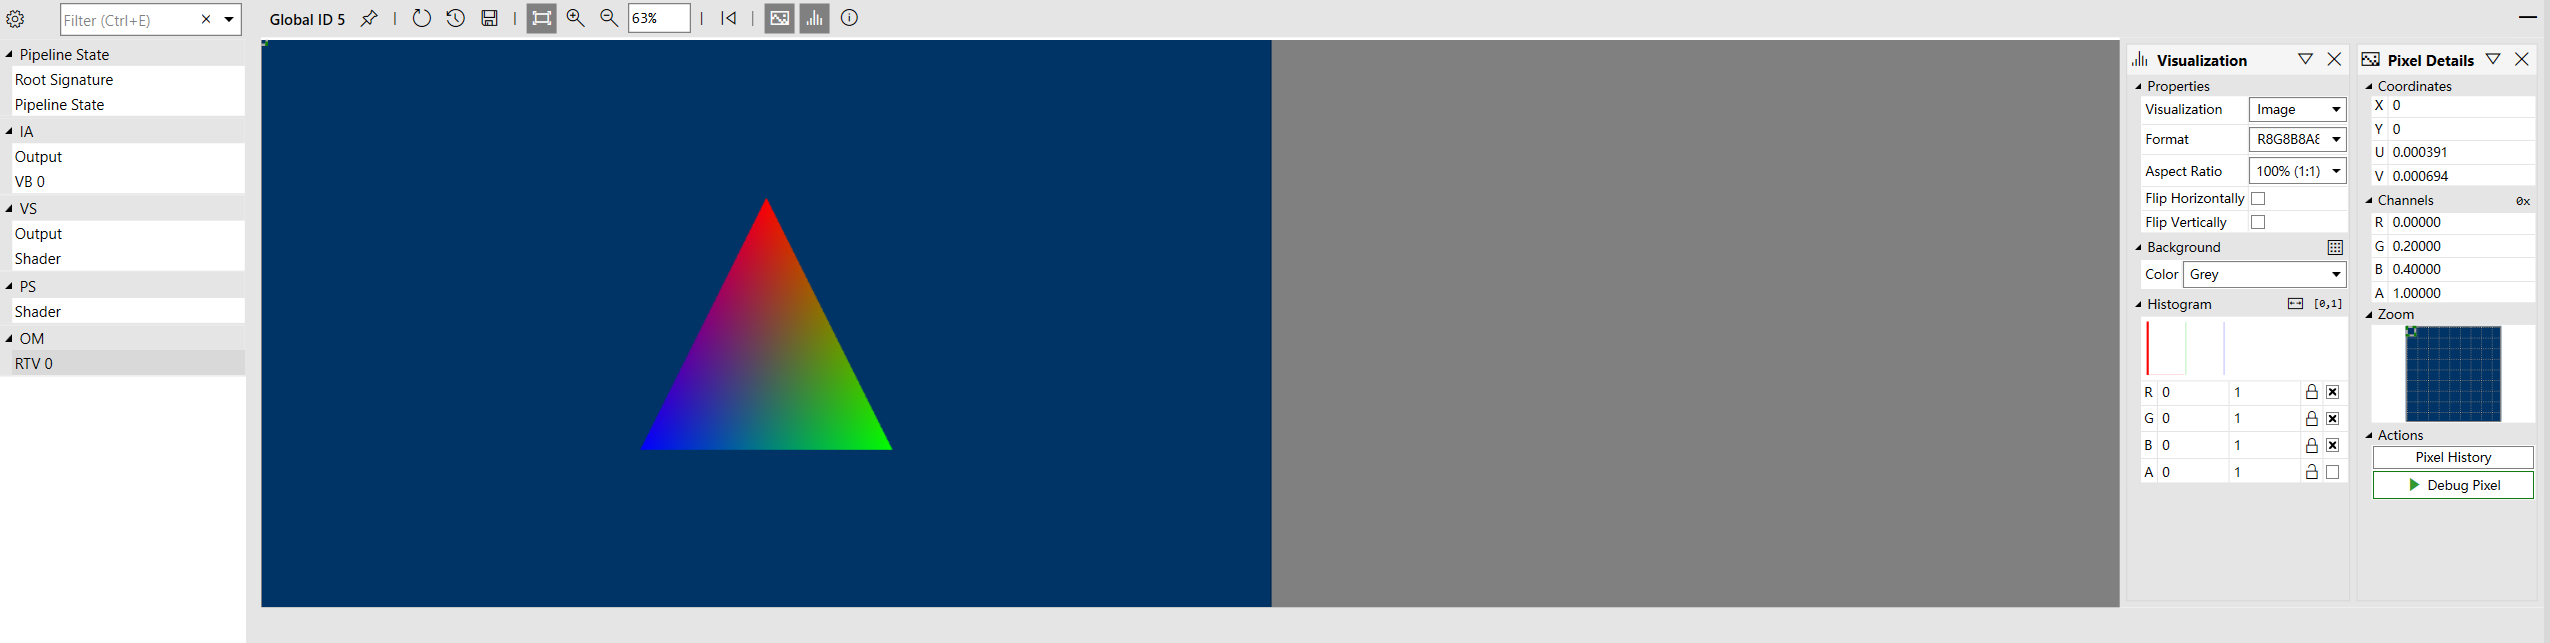


reference
Download - PIX on Windows (microsoft.com)
Configuring PIX to access PDBs for CPU Captures - PIX on Windows (microsoft.com)
Programmatic Capture - PIX on Windows (microsoft.com)
WinPixEventRuntime - PIX on Windows (microsoft.com)
Taking a Capture - PIX on Windows (microsoft.com)
文章来源: 博客园
- 还没有人评论,欢迎说说您的想法!
 客服
客服


