
顶置:
这里感谢这两位博主无私的奉献!!
popfisher https://www.cnblogs.com/popfisher/p/14719477.html
_SAW_ https://www.jianshu.com/p/55dce7a524f5
一、简述iOS14桌面小组件
1、只在iOS14及以上版本上支持,只支持SwiftUI来绘制页面;
2、只提供三种尺寸,大中小;
二、开发不可配置属性的小组件
1、创建一个APP,OC或者Swift均可;
2、打开新建项目,File > New > Target。选择 Widget Extension

点击Next
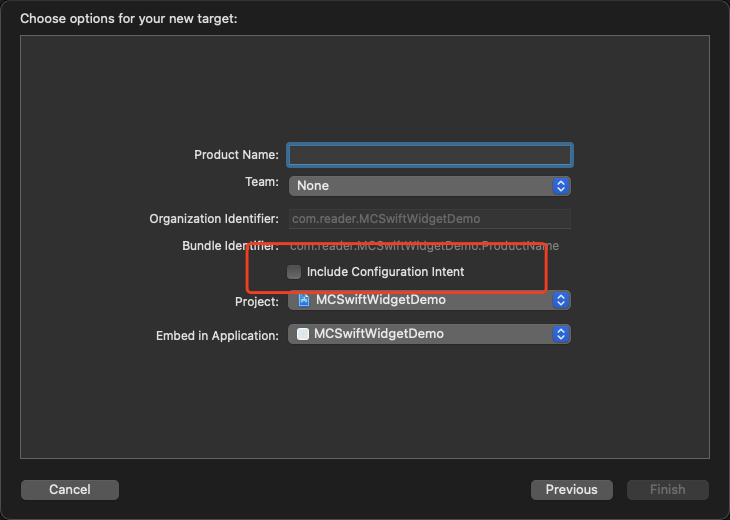
取好项目名字,这里的配置属性选项我们暂时不勾。
这样一个简单的小组件项目就建好了。
3、代码解析
//
//  Widget1.swift
//  Widget1
//

import WidgetKit
import SwiftUI

// 时间线刷新策略控制
struct Provider: TimelineProvider {
    // 窗口首次展示的时候,展示默认数据
    func placeholder(in context: Context) -> SimpleEntry {
        SimpleEntry(date: Date())
    }

    // 添加组件时的预览数据,在桌面滑动选择的时候展示数据
    func getSnapshot(in context: Context, completion: @escaping (SimpleEntry) -> ()) {
        let entry = SimpleEntry(date: Date())
        completion(entry)
    }

    // 时间线刷新策略控制逻辑
    func getTimeline(in context: Context, completion: @escaping (Timeline<Entry>) -> ()) {
        var entries: [SimpleEntry] = []

        // Generate a timeline consisting of five entries an hour apart, starting from the current date.
        let currentDate = Date()
        for hourOffset in 0 ..< 5 {
            let entryDate = Calendar.current.date(byAdding: .hour, value: hourOffset, to: currentDate)!
            let entry = SimpleEntry(date: entryDate)
            entries.append(entry)
        }

        let timeline = Timeline(entries: entries, policy: .atEnd)
        completion(timeline)
    }
}

struct SimpleEntry: TimelineEntry {
    // 默认带了一个日期参数
    let date: Date
}

struct Widget1EntryView : View {
    // 组件数据
    var entry: Provider.Entry

    // 这个 body 中就是自己需要实现的组件布局
    var body: some View {
        Text(entry.date, style: .time)
    }
}

// 小组件入口
@main
struct Widget1: Widget {
    // 小组件的唯一ID
    let kind: String = "Widget1"

    var body: some WidgetConfiguration {
        // 创建时不勾选 “Include Configuration Intent”,这里使用 StaticConfiguration
        StaticConfiguration(kind: kind, provider: Provider()) { entry in
            Widget1EntryView(entry: entry)  // 小组件UI
        }
        .supportedFamilies([.systemSmall, .systemLarge])  // 配置该组件支持的尺寸,如果不配置,默认是大中小都支持
        .configurationDisplayName("组件标题")   // 在添加组件预览界面显示
        .description("组件描述")                 // 在添加组件预览界面显示
    }
}

// 调试预览
struct Widget1_Previews: PreviewProvider {
    static var previews: some View {
        Widget1EntryView(entry: SimpleEntry(date: Date()))
            .previewContext(WidgetPreviewContext(family: .systemSmall))
    }
}
基本上不可配置组件就这么多了,在返回的View里面用SwiftUI 来自定义UI就能实现效果了。
三、实现自动每秒刷新的时间UI
先说下小组件的时间刷新机制,叫时间轴
官网解析:https://developer.apple.com/documentation/widgetkit/displaying-dynamic-dates
小组件每天的刷新次数是有上限的,每日预算通常包括四十到六十次刷新,该速率大致可以换算成没15到60分钟可以刷新一次,所以如果按照设置时间轴的方式来刷新是不可行的
另辟蹊径吧,看看苹果给我们提供的Text显示的几个内置方法
1、显示相对时间,使用该relative样式显示当前日期和时间与指定日期之间的绝对差异,无论日期是未来还是过去。该offset样式显示当前日期和时间与指定日期之间的差异,用减号 ( -) 前缀表示未来的日期,用加号 ( +) 前缀表示过去的日期。
let components = DateComponents(minute: 11, second: 14)
let futureDate = Calendar.current.date(byAdding: components, to: Date())!

Text(futureDate, style: .relative)
// Displays:
// 11 min, 14 sec

Text(futureDate, style: .offset)
// Displays:
// -11 minutes
2、显示持续自动更新的计时器,对于未来的日期,timer样式会倒计时直到当前时间到达指定的日期和时间,并在日期过去时向上计数。
let components = DateComponents(minute: 15)
let futureDate = Calendar.current.date(byAdding: components, to: Date())!

Text(futureDate, style: .timer)
// Displays:
// 15:00
3、要显示绝对日期或时间:
let components = DateComponents(year: 2020, month: 4, day: 1, hour: 9, minute: 41)
let aprilFirstDate = Calendar.current(components)!

Text(aprilFirstDate, style: .date)
Text("Date: (aprilFirstDate, style: .date)")
Text("Time: (aprilFirstDate, style: .time)")

// Displays:
// April 1, 2020
// Date: April 1, 2020
// Time: 9:41AM
4、要显示两个日期之间的时间间隔:
let startComponents = DateComponents(hour: 9, minute: 30)
let startDate = Calendar.current.date(from: startComponents)!

let endComponents = DateComponents(hour: 14, minute: 45)
let endDate = Calendar.current.date(from: endComponents)!

Text(startDate ... endDate)
Text("The meeting will take place: (startDate ... endDate)")

// Displays:
// 9:30AM-2:45PM
// The meeting will take place: 9:30AM-2:45PM
综上,我们可以利用 .timer 这个特性来实现按秒刷新,如果当前的时间比指定的时间大,则时间就会累计。
基于这个原理,我们只需要把时间起点定在每天的0点即可,根据当前的时间计算出今天的开始时间。
代码如下:
public extension Date {
    var calendar: Calendar {
        return Calendar(identifier: Calendar.current.identifier)
    }

    //年:2020
    var year: Int {
        get {
            return calendar.component(.year, from: self)
        }
        set {
            guard newValue > 0 else { return }
            let currentYear = calendar.component(.year, from: self)
            let yearsToAdd = newValue - currentYear
            if let date = calendar.date(byAdding: .year, value: yearsToAdd, to: self) {
                self = date
            }
        }
    }

    //月份:2
    var month: Int {
        get {
            return calendar.component(.month, from: self)
        }
        set {
            let allowedRange = calendar.range(of: .month, in: .year, for: self)!
            guard allowedRange.contains(newValue) else { return }

            let currentMonth = calendar.component(.month, from: self)
            let monthsToAdd = newValue - currentMonth
            if let date = calendar.date(byAdding: .month, value: monthsToAdd, to: self) {
                self = date
            }
        }
    }

    //天:10
    var day: Int {
        get {
            return calendar.component(.day, from: self)
        }
        set {
            let allowedRange = calendar.range(of: .day, in: .month, for: self)!
            guard allowedRange.contains(newValue) else { return }

            let currentDay = calendar.component(.day, from: self)
            let daysToAdd = newValue - currentDay
            if let date = calendar.date(byAdding: .day, value: daysToAdd, to: self) {
                self = date
            }
        }
    }

}


//小组件时间刷新相关
public extension Date {
    //获取完整时间,2011:07:13
    func getCurrentDayStartHour(_ isDayOf24Hours: Bool)-> Date {
        let components = DateComponents(year: self.year, month: self.month, day: self.day, hour: 0, minute: 0, second: 0)
        return Calendar.current.date(from: components)!
   }
}

//使用
 Text(Date().getCurrentDayStartHour(true), style: .timer)
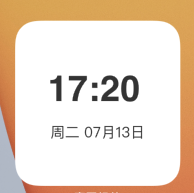
如果只想显示时分的话,我这边的处理方式是通过UI布局的方式隐藏掉秒,遮住一部分Text视图,效果如图:
四、实现可配置小组件(静态)
1、在新建小组件项目的时候,勾选上 可配置属性

2、分析代码
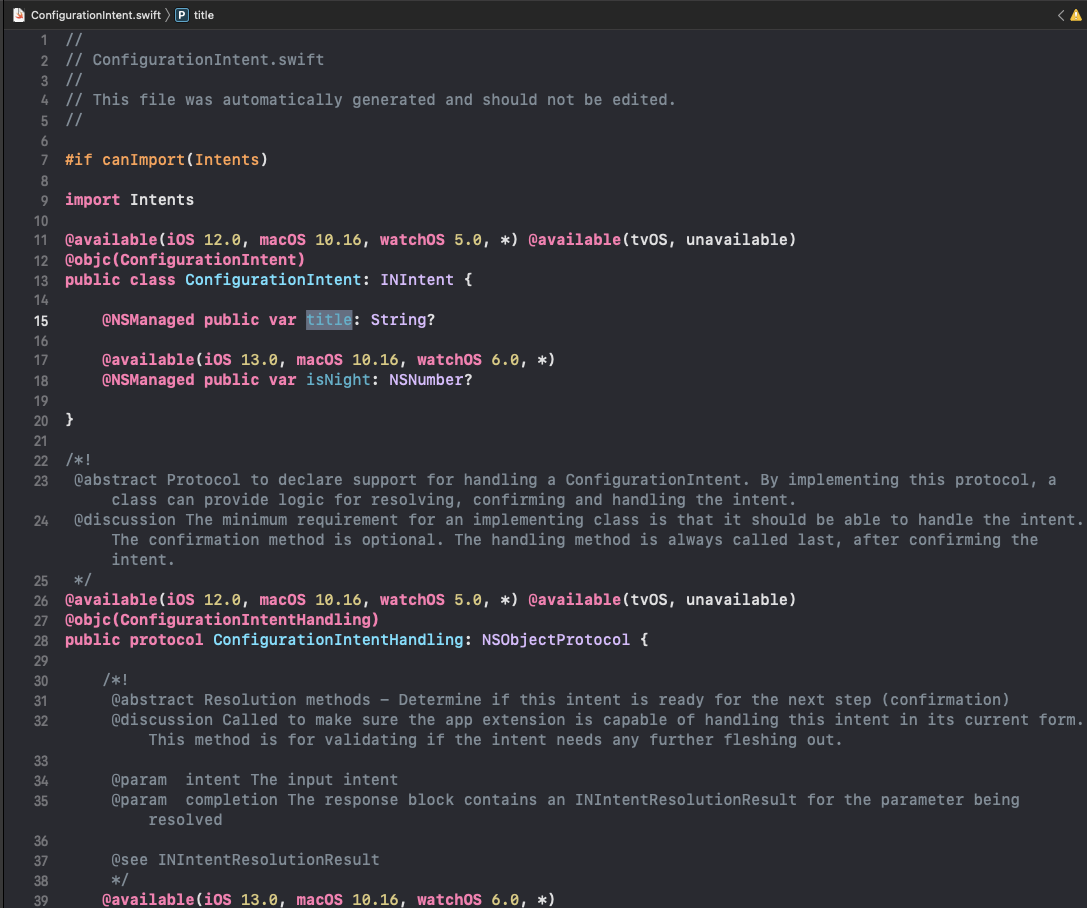
多了一个intentdefinition 配置文件,在swift文件里面实现的协议也变成了 IntentTimelineProvider,基本上每个协议方法里面都新增了一个 configuration 参数
新增一个title属性
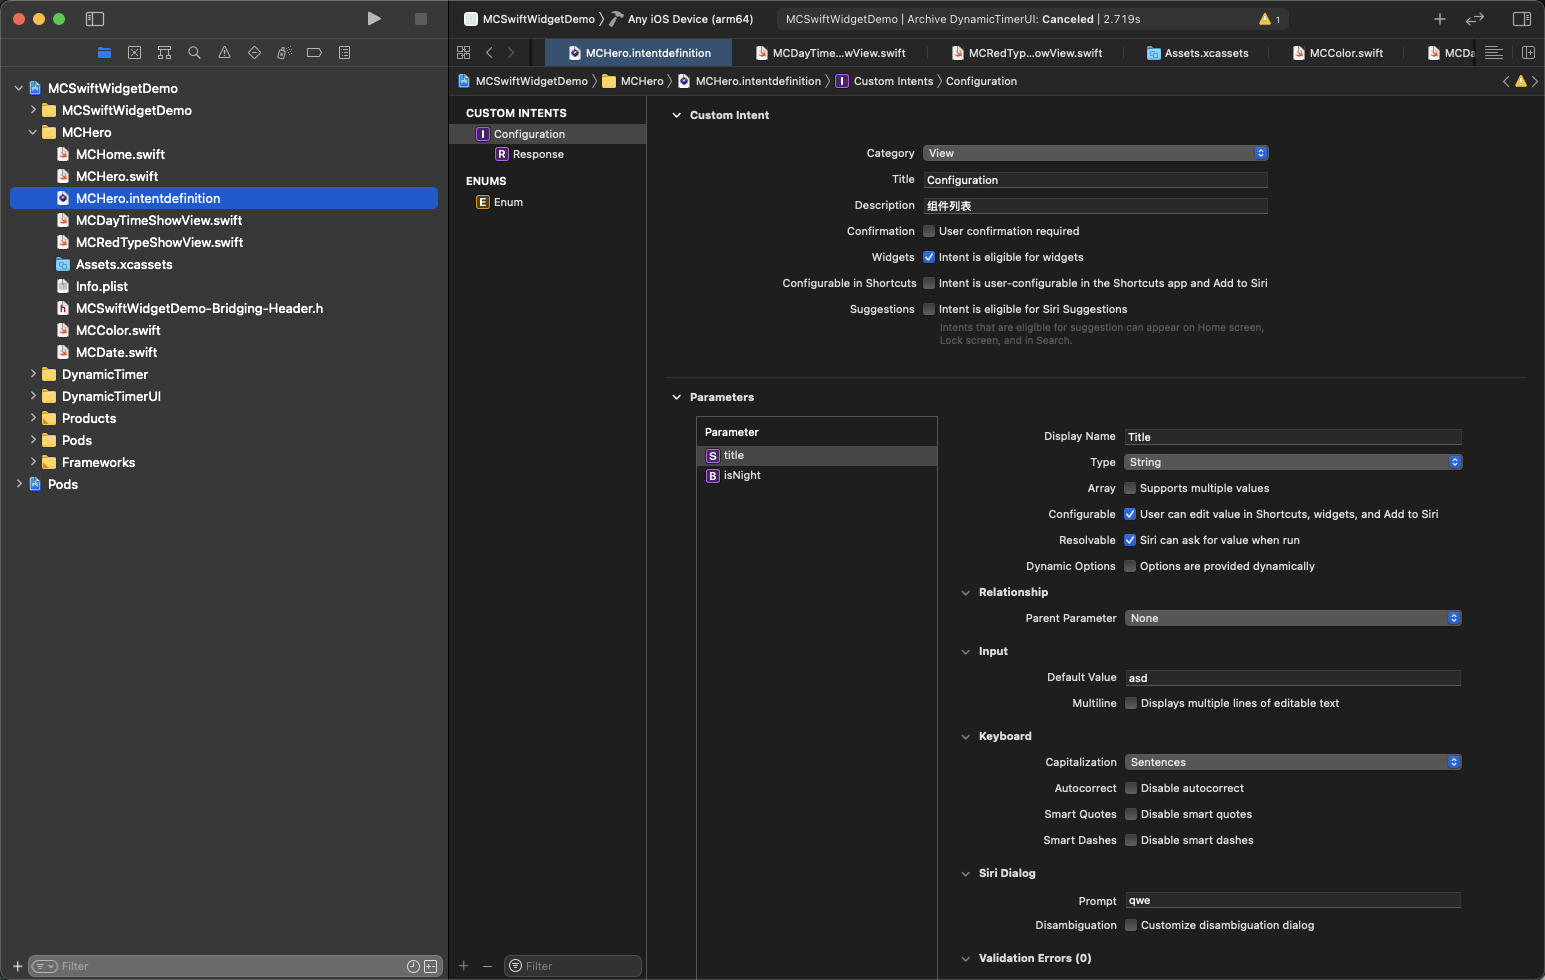
项目代码:
import WidgetKit
import SwiftUI
import Intents
struct Provider: IntentTimelineProvider {
func placeholder(in context: Context) -> SimpleEntry {
SimpleEntry(date: Date(), configuration: ConfigurationIntent())
}
func getSnapshot(for configuration: ConfigurationIntent, in context: Context, completion: @escaping (SimpleEntry) -> ()) {
let entry = SimpleEntry(date: Date(), configuration: configuration)
completion(entry)
}
func getTimeline(for configuration: ConfigurationIntent, in context: Context, completion: @escaping (Timeline<Entry>) -> ()) {
var entries: [SimpleEntry] = []
// Generate a timeline consisting of five entries an hour apart, starting from the current date.
let currentDate = Date()
for hourOffset in 0 ..< 5 {
let entryDate = Calendar.current.date(byAdding: .hour, value: hourOffset, to: currentDate)!
let entry = SimpleEntry(date: entryDate, configuration: configuration)
entries.append(entry)
}
let timeline = Timeline(entries: entries, policy: .atEnd)
completion(timeline)
}
}
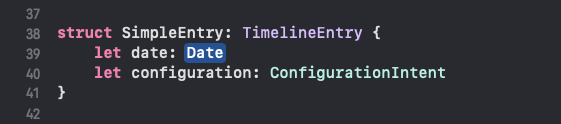
struct SimpleEntry: TimelineEntry {
let date: Date
let configuration: ConfigurationIntent
}
struct MCHeroEntryView : View {
var entry: Provider.Entry
@Environment(.widgetFamily) var family // 尺寸环境变量
@ViewBuilder
var body: some View {
switch family {
case .systemSmall:
ZStack{
Image(uiImage: UIImage(named: "runwen")!)
.resizable()
.scaleEffect()
.edgesIgnoringSafeArea(.all)
.aspectRatio(contentMode: .fill)
Text(entry.configuration.title == nil ? "英雄联盟" : entry.configuration.title!)
.foregroundColor(entry.configuration.isNight == true ? .white : .blue)
.offset(x: 50, y: 60)
}
case .systemMedium:
// 中尺寸
Text(entry.date, style: .time)
default:
Text(entry.date, style: .time)
}
}
}
struct MCHero: Widget {
let kind: String = "MCHero"
var body: some WidgetConfiguration {
IntentConfiguration(kind: kind, intent: ConfigurationIntent.self, provider: Provider()) { entry in
MCHeroEntryView(entry: entry)
}
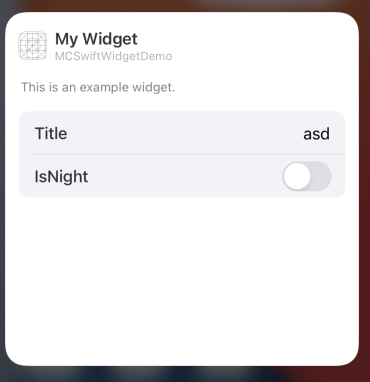
.configurationDisplayName("My Widget")
.description("This is an example widget.")
}
}
struct MCHero_Previews: PreviewProvider {
static var previews: some View {
MCHeroEntryView(entry: SimpleEntry(date: Date(), configuration: ConfigurationIntent()))
.previewContext(WidgetPreviewContext(family: .systemSmall))
}
}
有一个要注意的,我这里写了多个组件,多个组件的实现方式:
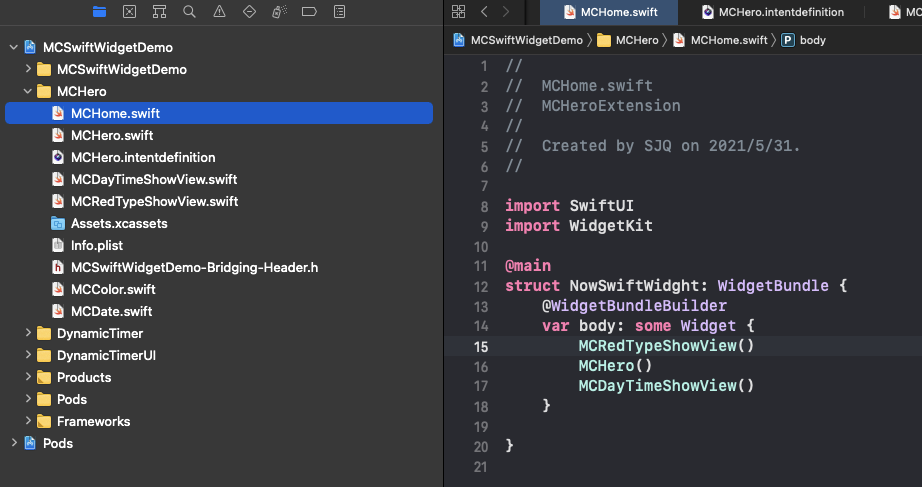
其实就是根据@main这个关键词来控制的
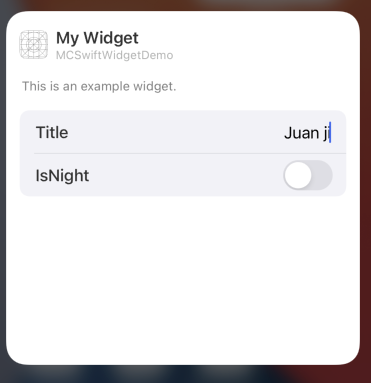
效果

3、注意点,如果是先创建了一个不可配置的小组件文件,想为了它加个配置的话,也很简单,先新建配置文件,右键-New File...
点击底部的+号,新建 New Intent,取好名字,然后配置按照上面复制一份就好了,代码里面也参照着加上这个字段就好了
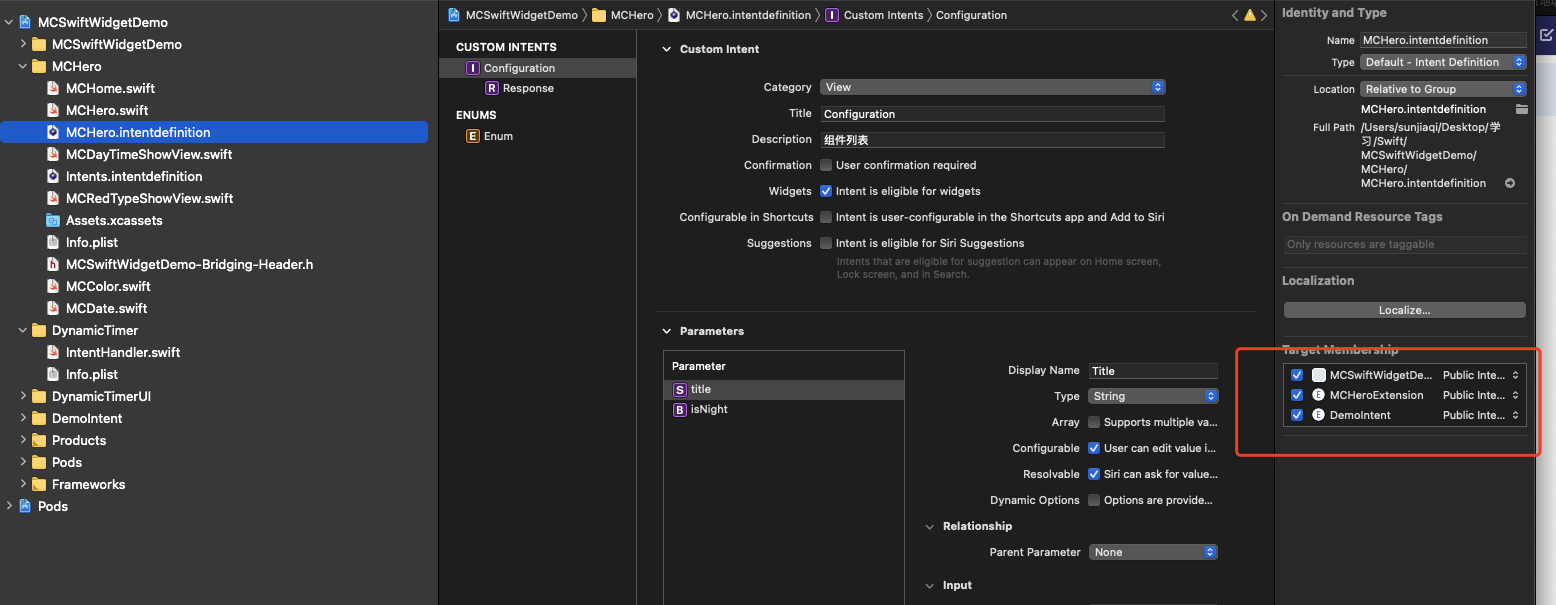
值得注意的是项目内的名字是以内部的名字为准

如上图,就是以右边的名字为准,代码里面的也是这个
在我们新增属性的时候,Xcode会给我们自动生成代码文件,可以从属性点进去,新版Xcode很坑,有时候你会发现这个属性点不出来,因为它没有自动给我们生成代码文件,所以需要重启Xcode才能生效!!!

五、实现可配置小组件(动态)
先按照上面的方式配置一份静态可配置组件文件
然后在项目中添加”Intens Extension“
1、选择“File”>“New”>“Target”,然后选择"Intens Extension"。

2、点击Next
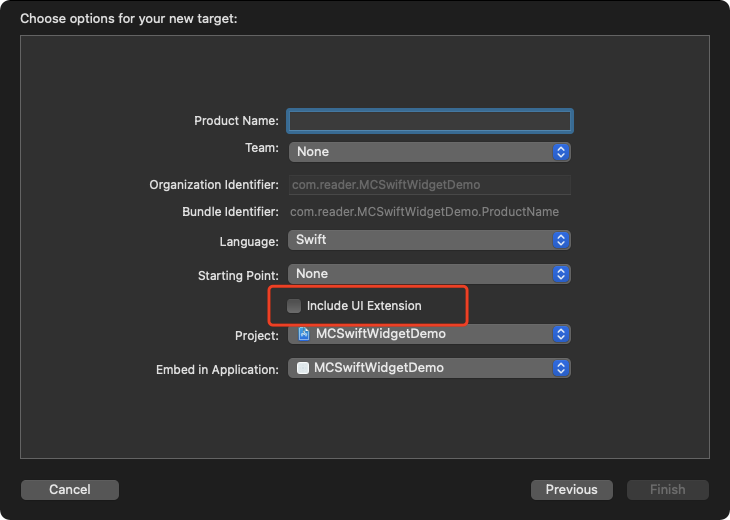
注意,这里不需要勾选UI选项
3、在新Target的属性的“Gneral”选项卡中,在“Supported Intents”部分中添加一个条目,并将“Class Name”设置为 "配置文件名". Xcode会自动把xxx.intentdefinition中的配置转为代码,放到这个文件中。
这里的名字就是我在上面强调的配置文件的实际名字,这步操作你可以理解为在这里注册!

4、选中配置文件,在支持文件里面勾选tag
全部勾上
4、选中配置文件,点击底部➕号,从“类型”弹出菜单中,选择“New Type”。Xcode在编辑器的“TYPES”中添加了一个新类型
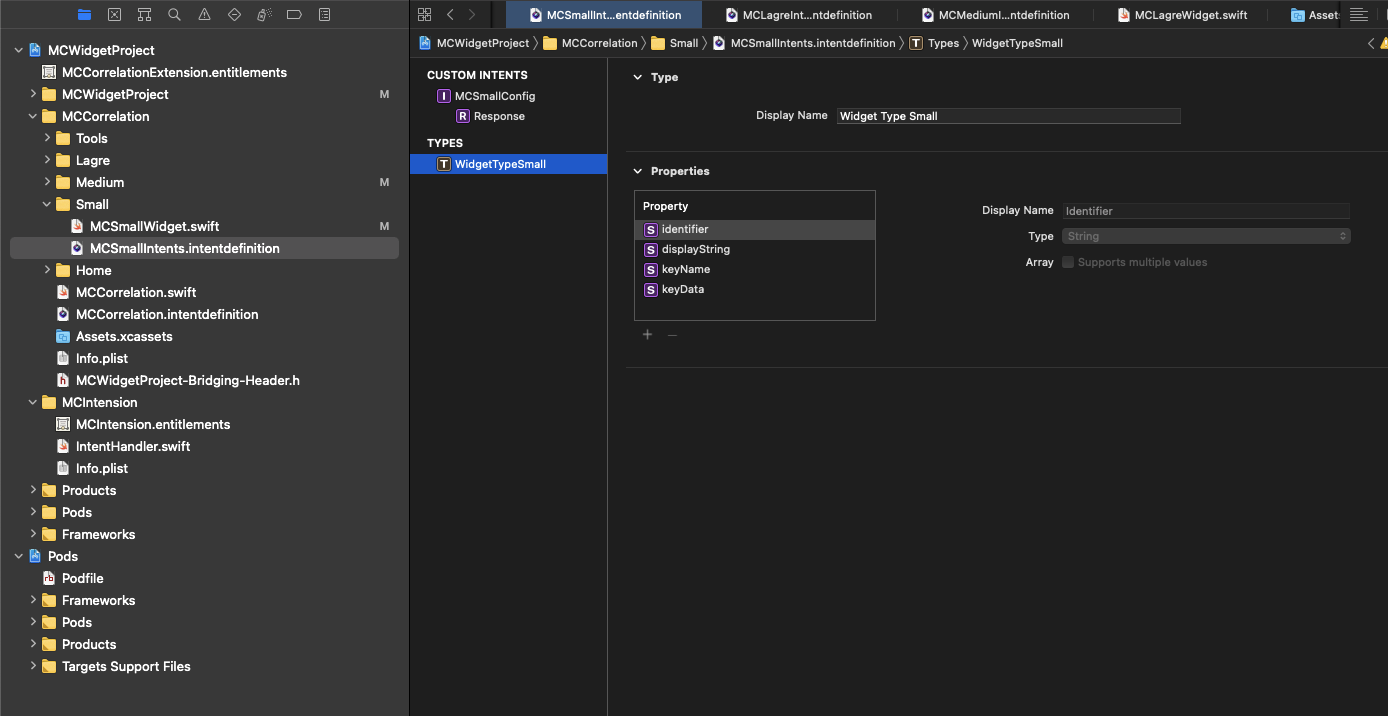
然后再在配置列表里面新增一个该类型的属性
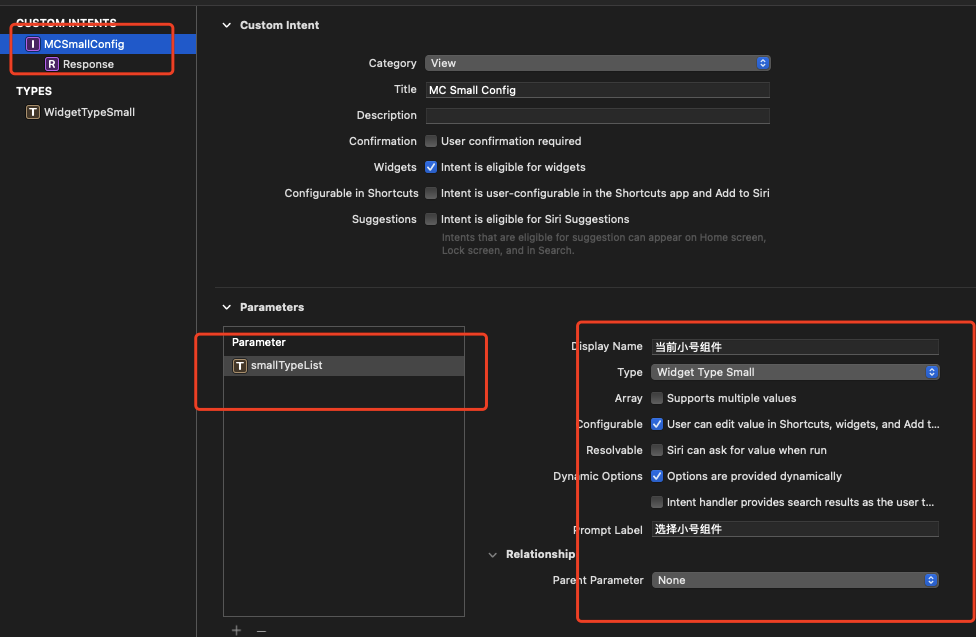
经过上面的步骤,我们准备好了所有的配置信息,这时候我们编译一下项目,Xcode会根据xxx.intentdefinition文件生成对应的代码。
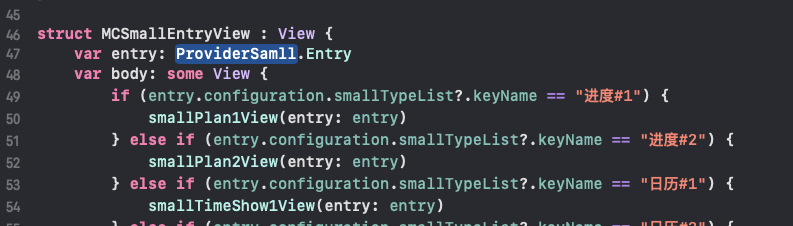
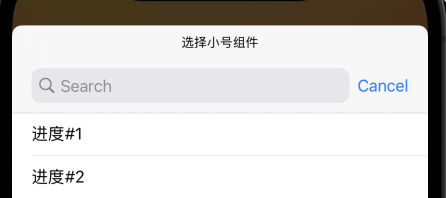
加载列表,打开我们刚刚新建的列表Tag,
import Intents

class IntentHandler: INExtension, MCSmallConfigIntentHandling, MCMediumConfigIntentHandling, MCLagreConfigIntentHandling {

    func provideSmallTypeListOptionsCollection(for intent: MCSmallConfigIntent, with completion: @escaping (INObjectCollection<WidgetTypeSmall>?, Error?) -> Void) {
        let type_1 = WidgetTypeSmall(identifier: "进度#1", display: "进度#1")
        type_1.keyName = "进度#1"
        let type_2 = WidgetTypeSmall(identifier: "进度#2", display: "进度#2")
        type_2.keyName = "进度#2"
        let allTimeType = [type_1, type_2]
        completion(INObjectCollection(items: allTimeType), nil)
    }

    func provideMediumTypeListOptionsCollection(for intent: MCMediumConfigIntent, with completion: @escaping (INObjectCollection<WidgetTypeMedium>?, Error?) -> Void) {
        let type_1 = WidgetTypeMedium(identifier: "进度#1", display: "进度#1")
        type_1.keyName = "进度#1"
        let type_2 = WidgetTypeMedium(identifier: "进度#2", display: "进度#2")
        type_2.keyName = "进度#2"
        let allTimeType = [type_1, type_2]
        completion(INObjectCollection(items: allTimeType), nil)
    }

    func provideLagreTypeListOptionsCollection(for intent: MCLagreConfigIntent, with completion: @escaping (INObjectCollection<WidgetTypeLagre>?, Error?) -> Void) {
        let type_1 = WidgetTypeLagre(identifier: "进度#1", display: "进度#1")
        type_1.keyName = "进度#1"
        let type_2 = WidgetTypeLagre(identifier: "进度#2", display: "进度#2")
        type_2.keyName = "进度#2"
        let allTimeType = [type_1, type_2 ]
        completion(INObjectCollection(items: allTimeType), nil)
    }

    override func handler(for intent: INIntent) -> Any {
        return self;
    }

}
注意:多个列表的话只需要在tag里面注册多个配置,实现多个协议方法就行

然后在代码里面使用
注意事项:在列表里面的配置文件都要选中列表的Tag!

这样就实现了动态加载列表,效果

六、点击交互
点击Widget窗口唤起APP进行交互指定跳转支持两种方式:
- widgetURL:点击区域是Widget的所有区域,适合元素、逻辑简单的小部件
- Link:通过Link修饰,允许让界面上不同元素产生点击响应
Widget支持三种显示方式,分别是systemSmall、 systemMedium、systemLarge,其中:
- systemSmall只能用widgetURL修饰符实现URL传递接收
- systemMedium、systemLarge可以用Link或者 widgetUrl处理
widgetURL和Link使用特点
- widgetURL一个布局中只有一个生效
- Link一个布局中可以有多个
- Link可以嵌套widgetURL, widgetURL可以签到Link
- Link可以嵌套Link
.widgetURL(URL(string: "medium/widgeturl_root"))
在APPDelegate中接收
//swift
func application(_ app: UIApplication, open url: URL, options: [UIApplication.OpenURLOptionsKey : Any] = [:]) -> Bool {

}

//OC
-(BOOL)application:(UIApplication *)app openURL:(NSURL *)url options:(NSDictionary<UIApplicationOpenURLOptionsKey,id> *)options{
    if ([url.scheme isEqualToString:@"NowWidget"]){
        //执行跳转后的操作
    }
    return YES;
}
scheme要在Geniens里面注册
七、APP与小组件数据共享
1、文件共享
在需要共享的文件,选中相关Tag就好了,如果是OC项目的话,会自动创建桥接文件的,把相关类名放进桥接文件里面导入就好了

2、图片共享
和文件一样,把Assets文件共享一下就可以了
3、数据传递
通过新建Group的方式,选中主项目的Tag,新建app Groups,勾选上其中一个列表就行,选中小组件项目Tag,同样创建一个Groups,勾选同样的一个列表。
使用:
NSUserDefaults *userDefaults = [[NSUserDefaults alloc] initWithSuiteName:@"group.com.bible.gospel.group"];
    NSString *content = [userDefaults objectForKey:@"widget"];

[userDefaults setObject:cashStr forKey:@"widget"];
let sharedDefaults = UserDefaults(suiteName: "group.com.bible.gospel.group")
let content: String = sharedDefaults?.string(forKey: "widget") ?? ""
差不多了,以后有新的东西再更新吧,看到这里应该可以完成大部分功能了!
总结几个坑点吧:
1、时间轴概念,要另辟蹊径实现每秒刷新机制显示
2、配置文件属性代码Xcode没有自动创建,需要重启Xcode
3、配置动态列表,注册完需要Run一下,不然有些协议文件也没有自动创建
4、多个列表的实现方式,网上基本上找不到资料,自己摸索出来的
5、数据共享的时候,要在两个项目的Tag里面同时创建Groups,不然不起作用
文章来源: 博客园
- 还没有人评论,欢迎说说您的想法!
 客服
客服


