
目录
1. urllib.request的基本使用
所谓网页抓取,就是把URL地址中指定的网络资源从网络流中抓取出来。在Python中有很多库可以用来抓取网页,我们先学习urllib.request。
Python模块源代码: C:UsershaochAnaconda3Lib
urllib.request源代码:C:UsershaochAnaconda3Liburllibrequest.py
1.1 urlopen
我们先来看源代码
# data没写-> get请求,否则是Post请求
def urlopen(url, data=None, timeout=socket._GLOBAL_DEFAULT_TIMEOUT,
            *, cafile=None, capath=None, cadefault=False, context=None):

    global _opener
    if cafile or capath or cadefault:
        import warnings
        warnings.warn("cafile, cpath and cadefault are deprecated, use a "
                      "custom context instead.", DeprecationWarning, 2)
        if context is not None:
            raise ValueError(
                "You can't pass both context and any of cafile, capath, and "
                "cadefault"
            )
        if not _have_ssl:
            raise ValueError('SSL support not available')
            # 知识点1: 做SSL认证
        context = ssl.create_default_context(ssl.Purpose.SERVER_AUTH,
                                             cafile=cafile,
                                             capath=capath)
        # 知识点2: 通过HTTPS处理器创建处理器对象
        https_handler = HTTPSHandler(context=context)
        # 知识点3: 将处理器对象包进去
        opener = build_opener(https_handler)
    elif context:
        https_handler = HTTPSHandler(context=context)
        opener = build_opener(https_handler)
    elif _opener is None:
        _opener = opener = build_opener()
    else:
        opener = _opener
        # 知识点4: 自定义的open方法
    return opener.open(url, data, timeout)
1.2. 用urlopen来获取网络源代码
# 导入urllib2 库
import urllib.request
# 向指定的url发送请求,并返回服务器响应的类文件对象
response = urllib.request.urlopen("http://www.baidu.com/")
# 类文件对象支持 文件对象的操作方法,如read()方法读取文件全部内容,返回字符串
html = response.read()
print(html)
实际上,如果我们在浏览器上打开百度主页, 右键选择“查看源代码”,你会发现,跟我们刚才打印出来的是一模一样。也就是说,上面的4行代码就已经帮我们把百度的首页的全部代码爬了下来。
1.3. urllib.request.Request的使用
如果需要执行更复杂的操作,比如增加HTTP报头,必须创建一个 Request 实例来作为urlopen()的参数;而需要访问的url地址则作为 Request 实例的参数。
import urllib.request
# url 作为Request()方法的参数,构造并返回一个Request对象
request = urllib.request.Request("http://www.baidu.com")
# Request对象作为urlopen()方法的参数,发送给服务器并接收响应
response = urllib.request.urlopen(request)
html = response.read()
print html
不加user-agent-请求信息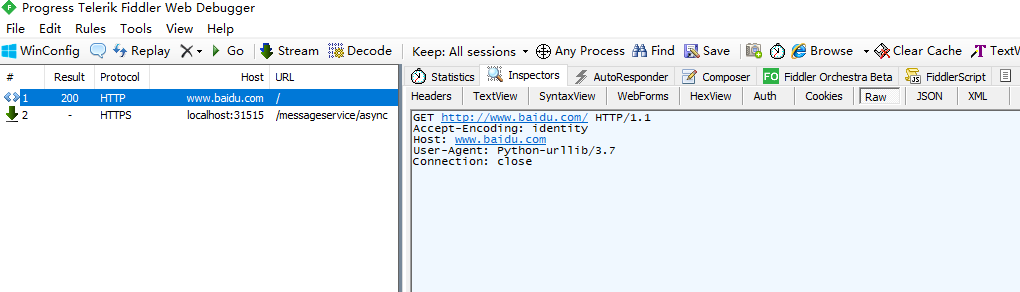
GET http://www.baidu.com/ HTTP/1.1
Accept-Encoding: identity
Host: www.baidu.com
User-Agent: Python-urllib/3.7
Connection: close
2. User-Ageng的使用-模拟浏览器发送请求
上面的例子中有一个最大缺点是不能给请求添加head,不能更改User-Agent的默认值,那么urlopen中User-Agent的值是什么呢,让我们来看源代码
class OpenerDirector:
    def __init__(self):
       # __version__ = '%d.%d' % sys.version_info[:2]--->sys.version[:3] = 3.7
        client_version = "Python-urllib/%s" % __version__
        # client_version = Python-urllib 3.7
        self.addheaders = [('User-agent', client_version)]
        # self.handlers is retained only for backward compatibility
        self.handlers = []
        # manage the individual handlers
        self.handle_open = {}
        self.handle_error = {}
        self.process_response = {}
        self.process_request = {}
urllib2默认的 User-Agent:Python-urllib 3.7,被管理员看到后,容易被封IP,应该重构我们的User-Agent
2.1) 为什么要用User-Agent?
我们用一个合法的身份去请求别人网站,显然人家就是欢迎的,所以我们就应该给我们的这个代码加上一个身份,就是所谓的User-Agent头。
- 浏览器 就是互联网世界上公认被允许的身份,如果我们希望我们的爬虫程序更像一个真实用户,那我们第一步就是需要伪装成一个被浏览器。用不同的浏览器在发送请求的时候,会有不同的 User-Agent 报头。
- urllib.request默认的User-Agent头为:Python-urllib/x.y (x和y 是Python 主.次 版本号,例如 Python-urllib/3.7)
2.2) 如何添加User-Agent信息到请求中去?
首先我们用抓包工具抓取请求,在其中获取User-Agent的值
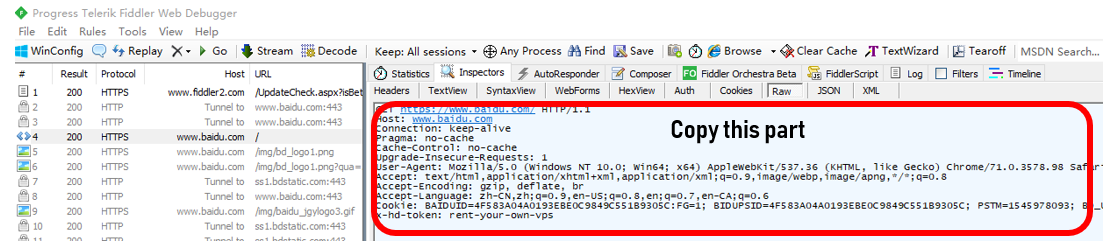
GET https://www.baidu.com/ HTTP/1.1
Host: www.baidu.com
Connection: keep-alive
Pragma: no-cache
Cache-Control: no-cache
Upgrade-Insecure-Requests: 1

# User-Agent 最重要的东西,必须写的东西
User-Agent: Mozilla/5.0 (Windows NT 10.0; Win64; x64) AppleWebKit/537.36 (KHTML, like Gecko) Chrome/71.0.3578.98 Safari/537.36

# 获取的数据类型
Accept: text/html,application/xhtml+xml,application/xml;q=0.9,image/webp,image/apng,*/*;q=0.8
# 压缩方式(一定不能写的,麻烦)
Accept-Encoding: gzip, deflate, br
Accept-Language: zh-CN,zh;q=0.9,en-US;q=0.8,en;q=0.7,en-CA;q=0.6
Cookie: BAIDUID=4F583A04A0193EBE0C9849C551B9305C:FG=1; BIDUPSID=4F583A04A0193EBE0C9849C551B9305C; PSTM=1545978093; BD_UPN=12314753; BDORZ=B490B5EBF6F3CD402E515D22BCDA1598; __cfduid=d7aafabcd6ccc970c2d47e9e205fc3c851546334654; cflag=13%3A3; delPer=0; BD_HOME=0; H_PS_PSSID=1440_21082_28205_28132_27245_27509
x-hd-token: rent-your-own-vps
我们只需要复制User-Agent的值即可,代码如下:
# IE 9.0 的 User-Agent,包含在 user_agent里
ua_headers = {"User-Agent": "Mozilla/5.0 (Windows NT 10.0; Win64; x64) AppleWebKit/537.36 (KHTML, like Gecko) Chrome/71.0.3578.98 Safari/537.36"}
#  url 连同 headers,一起构造Request请求,这个请求将附带 IE9.0 浏览器的User-Agent
request = urllib.request.Request("http://www.baidu.com", headers = ua_headers)
# 向服务器发送这个请求
response = urllib.request.urlopen(request)
html = response.read()
html
加user-agent-请求信息
GET http://www.baidu.com/ HTTP/1.1
Accept-Encoding: identity
Host: www.baidu.com
User-Agent: Mozilla/5.0 (Windows NT 10.0; Win64; x64) AppleWebKit/537.36 (KHTML, like Gecko) Chrome/71.0.3578.98 Safari/537.36
Connection: close
2.3) 添加更多的User-Ageng和Header的信息
- 添加一个特定的header
import urllib2

url = "http://www.itcast.cn"
#IE 9.0 的 User-Agent
user_agent = {"User-Agent" : "Mozilla/5.0 (compatible; MSIE 9.0; Windows NT 6.1; Trident/5.0)"}
request = urllib2.Request(url, headers = user_agent)
#也可以通过调用Request.add_header() 添加/修改一个特定的header
request.add_header("Connection", "keep-alive")
# 也可以通过调用Request.get_header()来查看header信息
# request.get_header(header_name="Connection")
response = urllib2.urlopen(request)
print response.code     #可以查看响应状态码
html = response.read()
print html- 随机添加/修改User-Agent
import urllib2
import random

url = "http://www.itcast.cn"

ua_list = [
    "Mozilla/5.0 (Windows NT 6.1; WOW64) AppleWebKit/537.1 (KHTML, like Gecko) Chrome/22.0.1207.1 Safari/537.1",
    "Mozilla/5.0 (X11; CrOS i686 2268.111.0) AppleWebKit/536.11 (KHTML, like Gecko) Chrome/20.0.1132.57 Safari/536.11",
    "Mozilla/5.0 (Windows NT 6.1; WOW64) AppleWebKit/536.6 (KHTML, like Gecko) Chrome/20.0.1092.0 Safari/536.6",
    "Mozilla/5.0 (Windows NT 6.1) AppleWebKit/536.6 (KHTML, like Gecko) Chrome/20.0.1090.0 Safari/536.6"
]

user_agent = random.choice(ua_list)
request = urllib2.Request(url)
#也可以通过调用Request.add_header() 添加/修改一个特定的header
request.add_header("User-Agent", user_agent)
# get_header()的字符串参数,第一个字母大写,后面的全部小写
request.get_header("User-agent")
response = urllib2.urlopen(request)
html = response.read()
print html
1.5. Response的其他用法
response.read()     # 读取爬取的内容
response.getcode()  # 返回HTTP的响应码,                       200=OK
response.geturl()   # 返回数据的是具体哪个URL, 防止重定向      'http://www.baidu.com'
response.info()     # 返回服务器响应的抱头信息
内容来源于网络如有侵权请私信删除
- 还没有人评论,欢迎说说您的想法!


 客服
客服


