Create test matrix(造数据)
set.seed(6)
test = matrix(rnorm(200), 20, 10)
test[1:10, seq(1, 10, 2)] = test[1:10, seq(1, 10, 2)] + 3
test[11:20, seq(2, 10, 2)] = test[11:20, seq(2, 10, 2)] + 2
test[15:20, seq(2, 10, 2)] = test[15:20, seq(2, 10, 2)] + 4
colnames(test) = paste("Test", 1:10, sep = "")
rownames(test) = paste("Gene", 1:20, sep = "")
正文从这里开始
# Show text within cells
pheatmap(test, display_numbers = TRUE)
pheatmap(test, display_numbers = TRUE, number_format = "\%.1e")
pheatmap(test, display_numbers = TRUE, display_numbers = matrix(ifelse(test > 5, "*", ""), nrow(test)))
-
display_numbers = T 即Show text within cells
-
number_format 可以格式输出display_number
-
或者干脆自定义一个matrix通过display_numbers参数进行display
# legend(图例)的设置选项
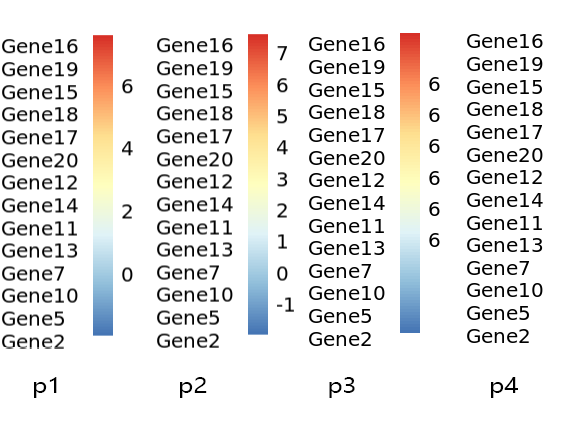
pheatmap(test)  # p1
pheatmap(test, legend_breaks = -1:7)  # p2
pheatmap(test, legend_breaks = 1:6, legend_labels = c("6","6", "6", "6", "6", "6"))  # p3
pheatmap(test, legend_breaks = 9:14, legend_labels = c("6","6", "6", "6", "6", "6"))  # p4
-
pheatmap函数会在内部算出legend的数值范围,本例中大概是 -1:7
-
在数值范围内,我们可以设定legend_breaks,以及对legend_breaks这个label的文本展示
-
legend_breaks和legend_labels是有一个对应关系的,否则报错如下
Error in pheatmap(test, legend_breaks = 1:6, legend_labels =
c(“6”, “6”, : Lengths of legend_breaks and legend_labels must be
the same -
假如我们的设定范围超出,就如p4所示

# Fix cell sizes and save to file with correct size
pheatmap(test, cellwidth = 15, cellheight = 12, main = "Example heatmap")  # the title of the plot
pheatmap(test, cellwidth = 15, cellheight = 12, fontsize = 8, filename = "test.pdf")  # save to pdf

# Change angle of text in the columns (0, 45, 90, 270 and 315)
pheatmap(test, angle_col = "45")
pheatmap(test, angle_col = "0")
有关annotation
# Generate annotations for rows and columns(先造数据)
annotation_col = data.frame(
                    CellType = factor(rep(c("CT1", "CT2"), 5)),
                    Time = 1:5
                )
rownames(annotation_col) = paste("Test", 1:10, sep = "")

annotation_row = data.frame(
                    GeneClass = factor(rep(c("Path1", "Path2", "Path3"), c(10, 4, 6)))
                )
rownames(annotation_row) = paste("Gene", 1:20, sep = "")

# Display row and color annotations
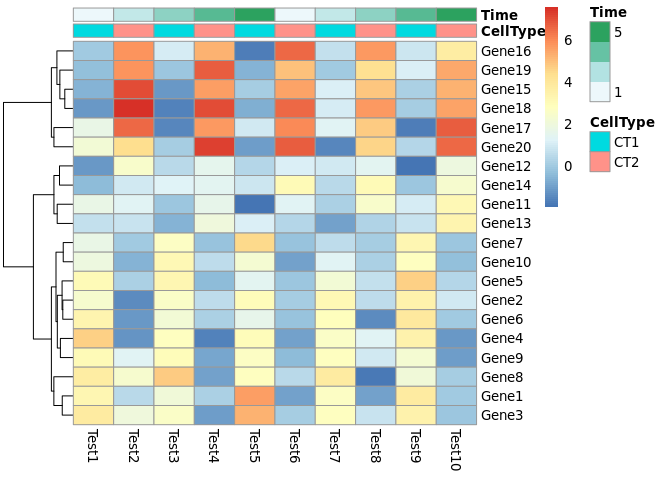
pheatmap(test, annotation_col = annotation_col, cluster_cols = F)

pheatmap(test, annotation_col = annotation_col, annotation_legend = FALSE, cluster_cols = F)

pheatmap(test, annotation_row = annotation_row, cluster_rows = F)

-
annotation数据首先要组织成dataframe,dataframe中的rownames要和注释项进行对应,
而column就是要展示的注释条,每个column都会生成一个注释条来显示 -
annotation_col/row 默认会有legend配合展示,annotation_legend = FALSE可以去掉legend
# Specify colors (自定义注释条颜色)
ann_colors = list(
    Time = c("white", "firebrick"),
    CellType = c(CT1 = "#1B9E77", CT2 = "#D95F02"),
    GeneClass = c(Path1 = "#7570B3", Path2 = "#E7298A", Path3 = "#66A61E")
)

pheatmap(test, annotation_col = annotation_col, annotation_colors = ann_colors)

pheatmap(test, annotation_col = annotation_col, annotation_row = annotation_row, annotation_colors = ann_colors)

- 注释条颜色数据要组织成list(list的灵活性就在此处凸显出来了),
list中的每个元素名作为对应项(对应前述dataframe中的colnames),
同时可以进一步为attribute指定颜色,例如CT1 = "#1B9E77", CT2 = "#D95F02"
参考资料
pheatmap帮助文档
文章来源: 博客园
- 还没有人评论,欢迎说说您的想法!


 客服
客服


