说明
使用 QCustomPlot 绘图库辅助开发时整理的学习笔记。同系列文章目录可见 《绘图库 QCustomPlot 学习笔记》目录。本篇介绍 QCustomPlot 的一种使用方法,通过包含源码的方式进行使用,这也是最常用的方法,示例中使用的 QCustomPlot 版本为 Version 2.1.1。
1. 下载源码
详见本人另一篇博客 【QCustomPlot】下载,使用时,只需要 qcustomplot.h 与 qcustomplot.cpp 两个文件。官网 - QCustomPlot - SettingUp 有对 QCustomPlot 的使用方法做介绍。
2. 使用方法
2.1 将源文件添加进项目
把 qcustomplot.h 与 qcustomplot.cpp 两个文件放在项目路径下,然后右键 项目名 -> 添加现有文件...,选择 qcustomplot.h 与 qcustomplot.cpp。
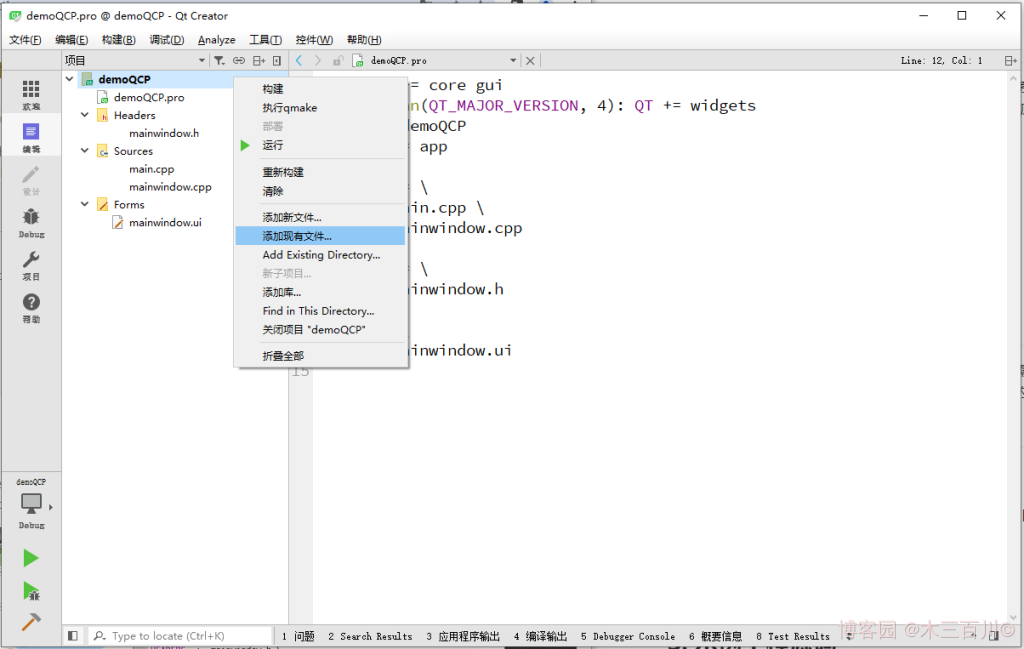
2.2 修改 .pro 工程文件
由于 QCustomPlot 具有导出 PDF 的功能,使用到了 printsupport 模块,因此需要在 .pro 工程文件中添加这一模块,如下所示,注意前面的版本条件。
greaterThan(QT_MAJOR_VERSION, 4): QT += widgets printsupport

2.3 将 QWidget 提升为 QCustomPlot
在设计界面中,右键某个 QWidget 控件,点击 提升为...。

在弹出的对话框中,先在 ”提升的类名称“ 一栏写上 QCustomPlot,注意大小写要完全一致,然后点击 添加 按钮,最后点击 提升 按钮。
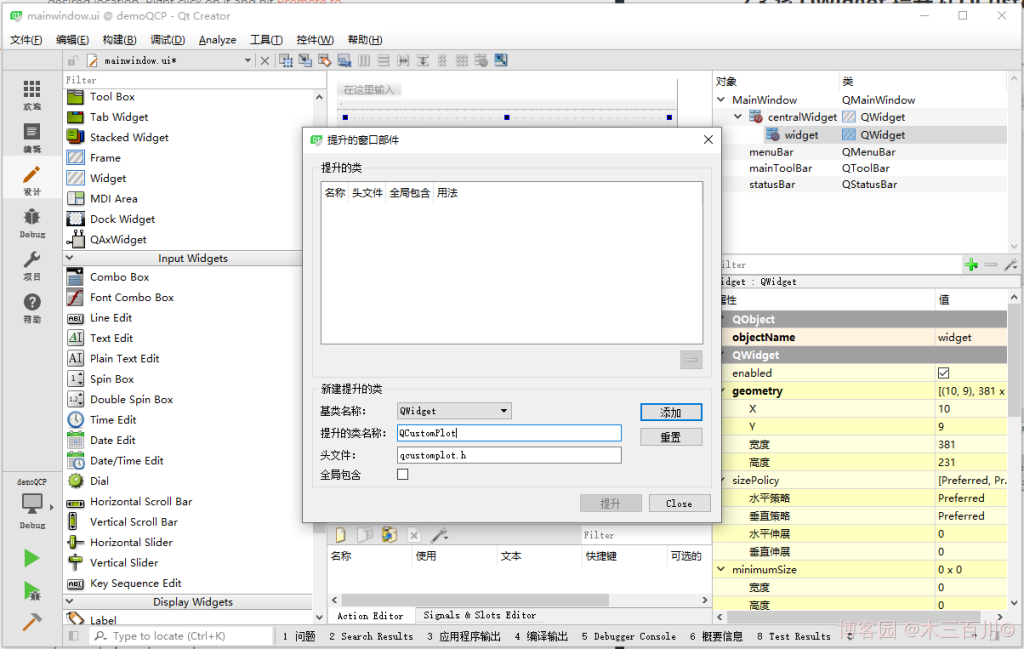
至此,这个 QWidget 控件就被提升为了 QCustomPlot 控件,可以进行绘图了。
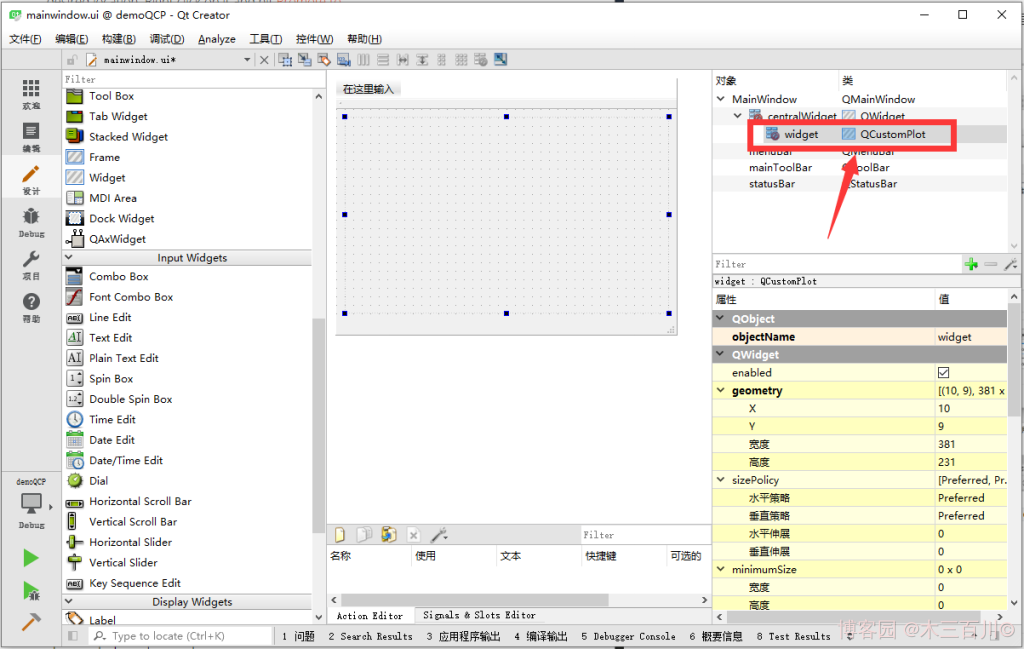
2.4 绘制图像
完成以上几步后,点击左下方的绿色三角,运行项目,会得到一个空的坐标轴,如下所示:
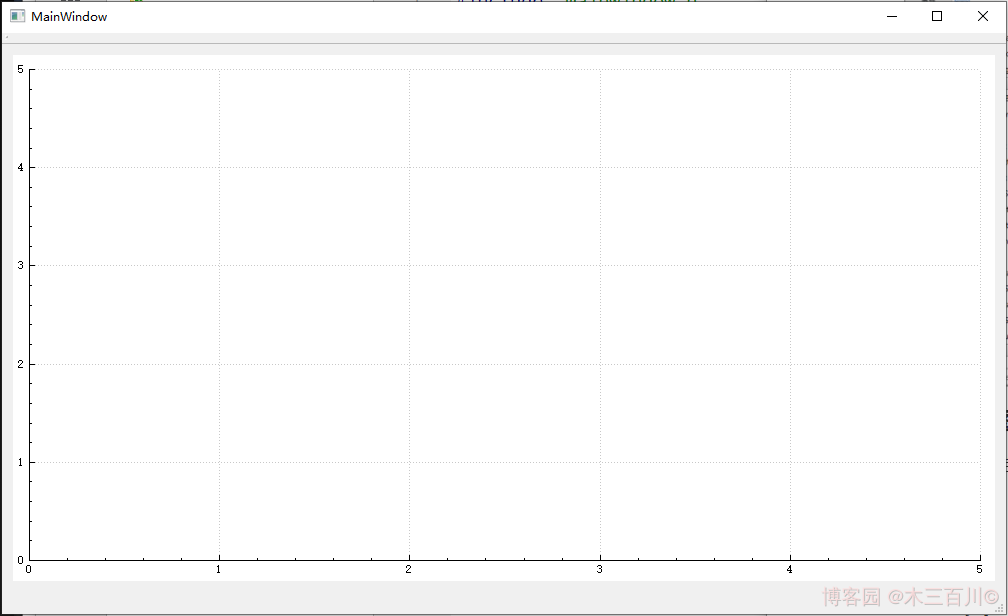
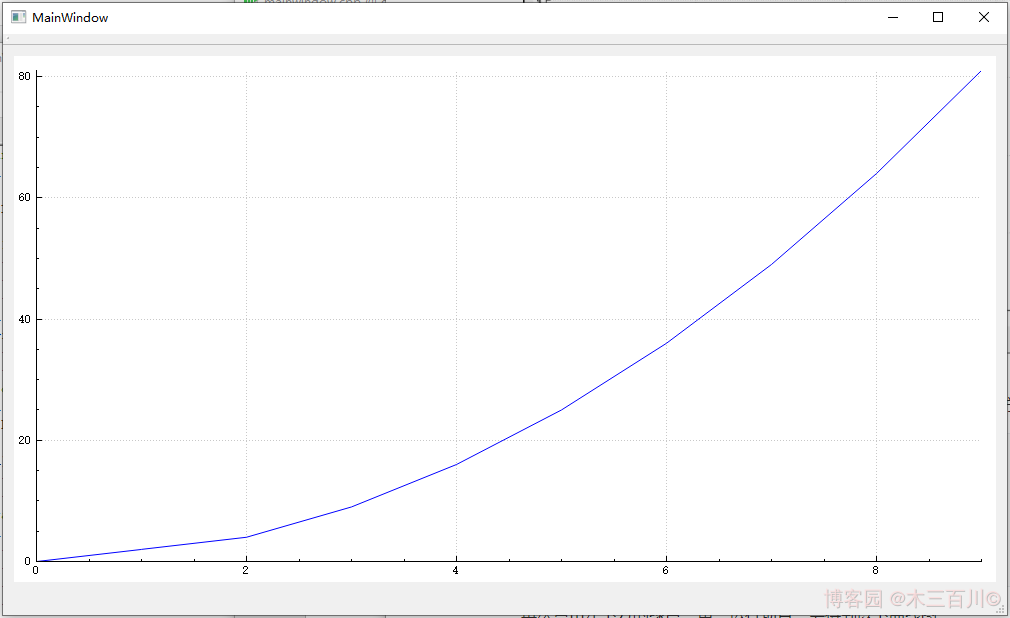
在这个区域内,可以使用 QCustomPlot 提供的方法绘制函数曲线图、参数曲线图、柱状图、箱线图、热力图等,详见帮助文档,或本人同系列博客。这里提供一个示例,在合适的地方添加如下代码:
QVector<double> x = {0,1,2,3,4,5,6,7,8,9};
QVector<double> y = {0,2,4,9,16,25,36,49,64,81};
ui->widget->addGraph();
ui->widget->graph(0)->setData(x, y);
ui->widget->graph(0)->rescaleAxes();
ui->widget->replot();
再次点击左下方的绿色三角,运行项目,会得到以下曲线图:
3. 示例工程源码
3.1 文件 demoQCP.pro
QT       += core gui
greaterThan(QT_MAJOR_VERSION, 4): QT += widgets printsupport
TARGET = demoQCP
TEMPLATE = app

SOURCES +=
        main.cpp
        mainwindow.cpp
        qcustomplot.cpp

HEADERS +=
        mainwindow.h
        qcustomplot.h

FORMS +=
        mainwindow.ui
3.2 文件 main.cpp
#include "mainwindow.h"
#include <QApplication>

int main(int argc, char *argv[])
{
    QApplication a(argc, argv);
    MainWindow w;
    w.show();

    return a.exec();
}
3.3 文件 mainwindow.h
#ifndef MAINWINDOW_H
#define MAINWINDOW_H

#include <QMainWindow>

namespace Ui {
class MainWindow;
}

class MainWindow : public QMainWindow
{
    Q_OBJECT

public:
    explicit MainWindow(QWidget *parent = 0);
    ~MainWindow();

private:
    Ui::MainWindow *ui;
};

#endif // MAINWINDOW_H
3.4 文件 mainwindow.cpp
#include "mainwindow.h"
#include "ui_mainwindow.h"

MainWindow::MainWindow(QWidget *parent) :
    QMainWindow(parent),
    ui(new Ui::MainWindow)
{
    ui->setupUi(this);

    // 绘图代码
    QVector<double> x = {0,1,2,3,4,5,6,7,8,9};
    QVector<double> y = {0,2,4,9,16,25,36,49,64,81};
    ui->widget->addGraph();
    ui->widget->graph(0)->setData(x, y);
    ui->widget->graph(0)->rescaleAxes();
    ui->widget->replot();
}

MainWindow::~MainWindow()
{
    delete ui;
}
3.5 其他文件
除以上四个文件外,还剩三个文件:mainwindow.ui、qcustomplot.h、qcustomplot.cpp。其中 mainwindow.ui 是 Qt Creator 生成的默认 UI 文件,界面中只多了一个提升后的 QCustomPlot 控件,可使用同样步骤再次生成。qcustomplot.h 与 qcustomplot.cpp 即是下载所得的两个文件。
文章来源: 博客园
- 还没有人评论,欢迎说说您的想法!



 客服
客服


