
本文将介绍如何在.NET Core3环境下使用MVVM框架Prism的应用程序的模块化
前言
我们都知道,为了构成一个低耦合,高内聚的应用程序,我们会分层,拿一个WPF程序来说,我们通过MVVM模式去将一个应用程序的分成View-ViewModel-Model,大大消除之前业务逻辑和界面元素之间存在的高耦合,使我们后台开发人员可以将重点更放在业务逻辑层面上,属于UI界面的则可以交给更专业的UI人员
但是一个应用程序是由不同的业务模块来组合而成,我们理想状态下,每个业务模块拥有着能够独立的功能,并且和其他业务模块之间的是低耦合关系的,且每个业务模块可以单独用来开发,测试和部署,这样组成的应用程序是非常容易扩展,测试和维护的,而Prism提供将应用程序模块化的功能
我们先来看下一个小Demo
再来看看解决方案的项目: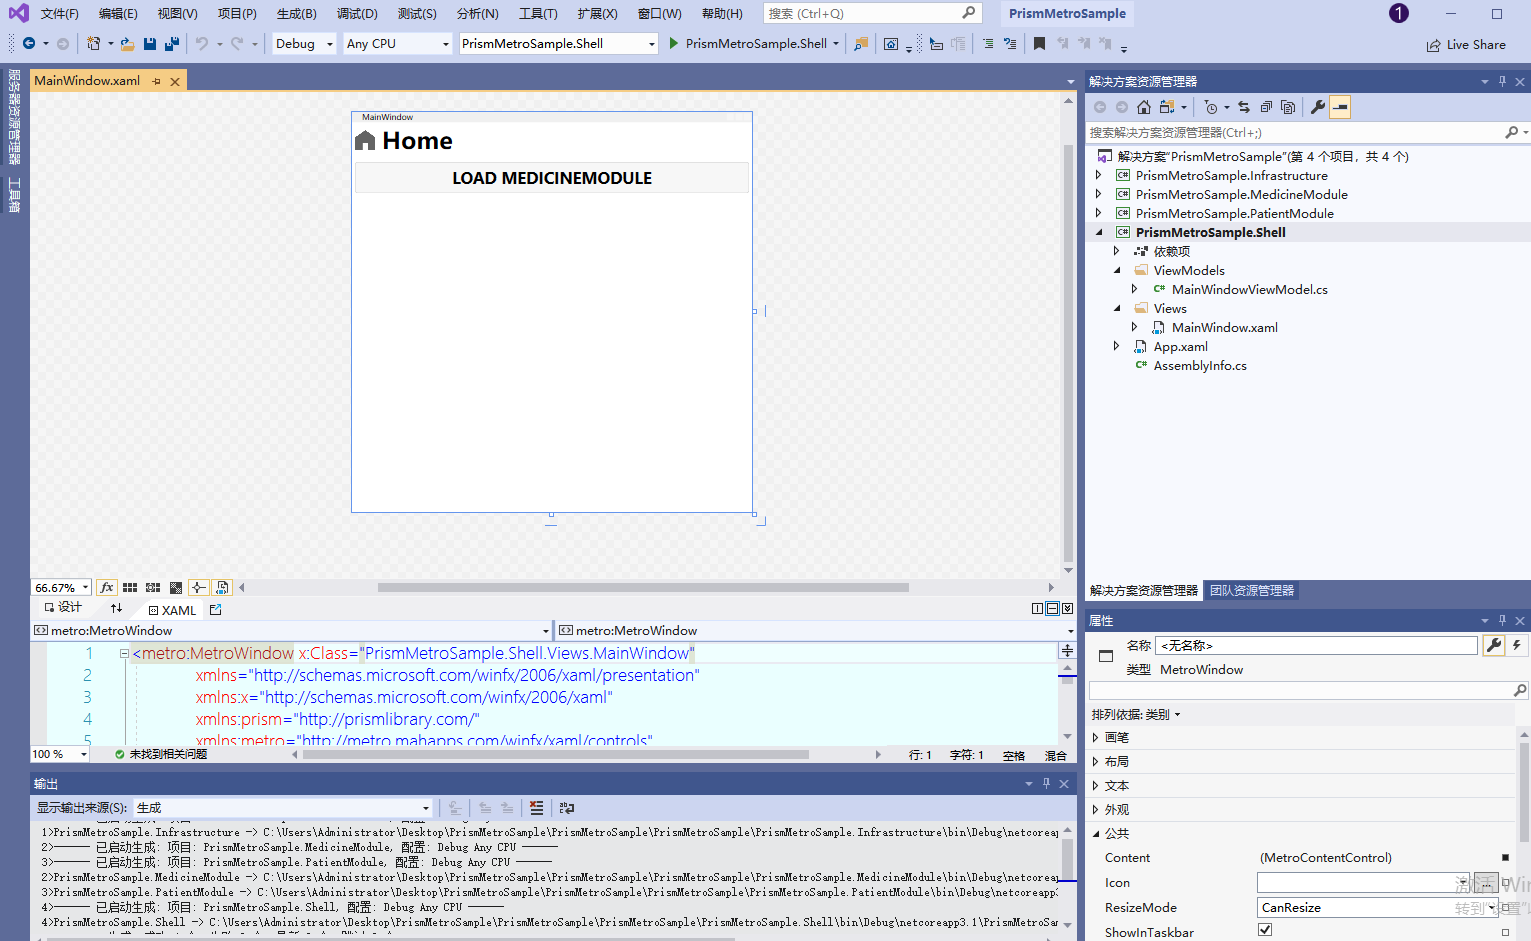
我将该小demo,分为四个项目,其中Shell为主窗体项目,然后MedicineModule和PatientModule为我们分割开的业务模块,最后Infrastructure则为我们的公共共享项目,我们将一步步讲解该demo如何进行模块化的.
首先,我们引用官方的一个图,大致讲解了创建加载模块的流程: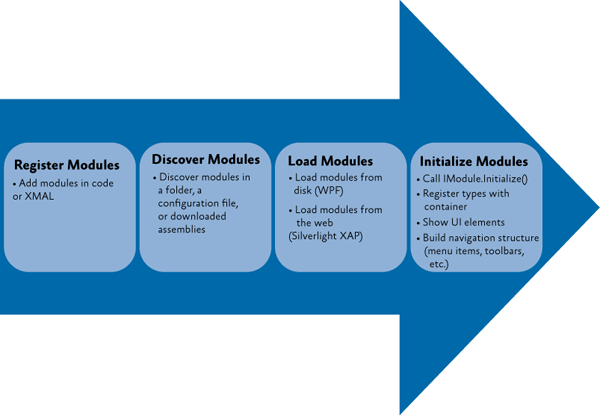
- 注册/发现模块
- 加载模块
- 初始化模块
我们就根据这个流程来看看demo是如何进行模块化的?
一.注册/发现模块
1.注册模块
prism注册模块有三种方式:
- 代码注册
- 目录文件扫描注册
- 配置文件App.config注册
我们先用代码注册的方式,首先我们要先定义模块,我们分别在PrismMetroSample.MedicineModule和PrismMetroSample.PatientModule两个项目中创建MedicineModule类和PatientModule类,代码如下:
MedicineModule.cs:
 public class MedicineModule : IModule
 {
     public void OnInitialized(IContainerProvider containerProvider)
     {
         var regionManager = containerProvider.Resolve<IRegionManager>();


         //MedicineMainContent
         regionManager.RegisterViewWithRegion(RegionNames.MedicineMainContentRegion, typeof(MedicineMainContent));

         //SearchMedicine-Flyout
         regionManager.RegisterViewWithRegion(RegionNames.FlyoutRegion, typeof(SearchMedicine));

         //rightWindowCommandsRegion
         regionManager.RegisterViewWithRegion(RegionNames.ShowSearchPatientRegion, typeof(ShowSearchPatient));
        }

     public void RegisterTypes(IContainerRegistry containerRegistry)
     {

     }
 }
PatientModule.cs:
 public class PatientModule : IModule
 {
     public void OnInitialized(IContainerProvider containerProvider)
     {
         var regionManager = containerProvider.Resolve<IRegionManager>();

         //PatientList
         regionManager.RegisterViewWithRegion(RegionNames.PatientListRegion, typeof(PatientList));
         //PatientDetail-Flyout
         regionManager.RegisterViewWithRegion(RegionNames.FlyoutRegion, typeof(PatientDetail));

     }

     public void RegisterTypes(IContainerRegistry containerRegistry)
     {

     }
 }
1.代码注册
然后我们在PrismMetroSample.Shell主窗体的项目分别引用PrismMetroSample.MedicineModule和PrismMetroSample.PatientModule程序集,之后在App.xaml.cs中代码注册:
protected override void ConfigureModuleCatalog(IModuleCatalog moduleCatalog)
{
   moduleCatalog.AddModule<PrismMetroSample.PatientModule.PatientModule>();

    //将MedicineModule模块设置为按需加载
   var MedicineModuleType = typeof(PrismMetroSample.MedicineModule.MedicineModule);
   moduleCatalog.AddModule(new ModuleInfo()
   {
        ModuleName= MedicineModuleType.Name,
        ModuleType=MedicineModuleType.AssemblyQualifiedName,
        InitializationMode=InitializationMode.OnDemand
    });

 }
注:代码注册是没有所谓的发现模块部分,是直接注册部分
2.目录文件扫描注册
2.1注册模块
首先我们先在MedicineModule加上特性,OnDemand为true为"按需"加载,而PatientModule默认加载则可以不加
 [Module(ModuleName = "MedicineModule", OnDemand =true)]
 public class MedicineModule : IModule
然后我们将PrismMetroSample.MedicineModule项目和PrismMetroSample.PatientModule项目设置生成事件dll拷贝到PrismMetroSample.Shell项目binDebug下的Modules文件夹下
生成事件命令行如下:
xcopy "$(TargetDir)$(TargetName)*$(TargetExt)" "$(SolutionDir)PrismMetroSample.ShellbinDebugnetcoreapp3.1Modules" /Y /S
2.2发现模块
然后我们在App.xaml.cs重载实现该函数:
protected override IModuleCatalog CreateModuleCatalog()
{
   //获取该路径下的文件夹的模块目录
   return new DirectoryModuleCatalog() { ModulePath = @".Modules" };
}
3.使用配置文件App.config注册
3.1注册模块
我们在主窗体项目PrismMetroSample.Shell添加一个App.config文件:
App.config:
<?xml version="1.0" encoding="utf-8" ?>
<configuration>
  <configSections>
    <section name="modules" type="Prism.Modularity.ModulesConfigurationSection, Prism.Wpf"/>
  </configSections>
  <modules>
    <!--注册PatientModule模块-->
    <module assemblyFile="PrismMetroSample.PatientModule.dll" moduleType="PrismMetroSample.PatientModule.PatientModule, PrismMetroSample.PatientModule, Version=1.0.0.0, Culture=neutral, PublicKeyToken=null" moduleName="PatientModule" startupLoaded="True" />
    <!--注册MedicineModule模块-->
    <module assemblyFile="PrismMetroSample.MedicineModule.dll" moduleType="PrismMetroSample.MedicineModule.MedicineModule, PrismMetroSample.MedicineModule, Version=1.0.0.0, Culture=neutral, PublicKeyToken=null" moduleName="MedicineModule" startupLoaded="false" />
  </modules>
</configuration>
其中startupLoaded为true则设置自动加载,为"可用时"模块,为false则不加载,设置为“按需”模块
3.2发现模块
修改App.xaml.cs的CreateModuleCatalog函数:
App.xaml.cs:
 protected override IModuleCatalog CreateModuleCatalog()
 {
    return new ConfigurationModuleCatalog();//加载配置文件模块目录
 }
二.加载模块
prism应用程序加载模块有两种方式:
- 加载“可用时”的模块(默认方式)
- 根据情况加载“按需”模块
在代码注册时候,我将通过默认方式注册了PatientModule,然后注册MedicineModule将其设置为"按需"加载,“按需”加载有个好处就是,应用程序运行初始化后,MedicineModule模块是不加载到内存的,这样就提供了很大的灵活空间,默认我们可以加载一些"可用"的模块,然后我们可以根据自身要求去"按需"加载我们所需要的模块
这里可以讲解下按需加载MedicineModule的代码实现,首先我们已经在App.cs中将MedicineModule设置为"按需"加载,然后我们在主窗体通过一个按钮去加载MedicineModule,代码如下:
MainWindowViewModle.cs:
 public class MainWindowViewModel : BindableBase
 {
    IModuleManager _moduleManager;
    public MainWindowViewModel(IModuleManager moduleManager)
    {
       _moduleManager = moduleManager;
    }

    private DelegateCommand _loadPatientModuleCommand;
    public DelegateCommand LoadPatientModuleCommand =>
        _loadPatientModuleCommand ?? (_loadPatientModuleCommand = new DelegateCommand(ExecuteLoadPatientModuleCommand));

    void ExecuteLoadPatientModuleCommand()
    {
       _moduleManager.LoadModule("MedicineModule");
    }
 }
我们还可以去检测加载模块完成事件,我们MainWindowViewModle中加上这几句:
IModuleManager _moduleManager;
public MainWindowViewModel(IModuleManager moduleManager)
{
   _moduleManager = moduleManager;
   _moduleManager.LoadModuleCompleted += _moduleManager_LoadModuleCompleted;
}

private void _moduleManager_LoadModuleCompleted(object sender, LoadModuleCompletedEventArgs e)
{
   MessageBox.Show($"{e.ModuleInfo.ModuleName}模块被加载了");
}
效果如下:
三.初始化模块
加载模块后,模块就会进行初始化,我们以MedicineModule为例子,先来看看代码:
 public class MedicineModule : IModule
 {
     public void OnInitialized(IContainerProvider containerProvider)
     {
         var regionManager = containerProvider.Resolve<IRegionManager>();


         //MedicineMainContent
         regionManager.RegisterViewWithRegion(RegionNames.MedicineMainContentRegion, typeof(MedicineMainContent));

         //SearchMedicine-Flyout
         regionManager.RegisterViewWithRegion(RegionNames.FlyoutRegion, typeof(SearchMedicine));

         //rightWindowCommandsRegion
         regionManager.RegisterViewWithRegion(RegionNames.ShowSearchPatientRegion, typeof(ShowSearchPatient));
        }

     public void RegisterTypes(IContainerRegistry containerRegistry)
     {

     }
 }
其中,IModule接口定义了两个函数OnInitialized和RegisterTypes,其中初始化顺序是RegisterTypes->OnInitialized,也就是RegisterTypes函数会先于OnInitialized函数,虽然这里我没在RegisterTypes写代码,但是这里通过是可以依赖注入到容器,给MedicineModule模块使用的,而OnInitialized我们通常会注册模块试图,或者订阅应用程序级别的事件和服务,这里我是将三个View分别分区域注册模块视图
最后,其实一开始我们看到Demo演示,点击病人列表,出来的病人详细页是没有数据的,这涉及到窗体之间的通讯,病人列表和病人详细页属于同一模块,这很好办,如何我要将搜索到的药物加到当前病人详细页的药物列表里面,这就涉及到不同模块窗体之间的通讯,处理不好是会造成模块之间的强耦合,下篇我们会讲到如何使用事件聚合器来实现同一模块不同窗体的通讯和不同模块不同窗体的通讯,而完整的Demo也会在下一篇放出。
文章来源: 博客园
- 还没有人评论,欢迎说说您的想法!
 客服
客服


