
在项目中有没有遇见过要对接直播接口的需求?我想大家都是有的。但是怎么说呢,对接第三方的缺点也很明显,除去那不可避免的一些事故。最大的缺点就是要钱!!!要钱!!!要钱!!!
对于我们公司来说。一般都是要先上线,在考虑效率。所以经过我不断地查询资料找到了一款可以搭建直播服务器的工具 。就是他 nginx.exe
下面直接开撸!首先放一下官网地址:http://nginx.org/en/download.html
博主用的是window系统其它系统。。请绕路。下载安装之后需要增加几个文件夹。

然后打开conf下的nginx.conf 按照下面进行配置
worker_processes  1;   #Nginx进程数,建议设置为等于CPU总核数

events {
    worker_connections  1024;  #工作模式与连接数上限
}

rtmp_auto_push on;


#RTMP服务
rtmp{
    server{
        listen 1935;        #服务端口
        chunk_size 4096;    #数据传输块的大小

        application vod{
            play ./vod;   #视频文件存放位置
        }
        application live{
            live on;                     #开启直播
            hls on;                      #开启hls直播。这个参数把直播服务器改造成实时回放服务器
            #wait_key on;                #对视频切片进行保护,这样就不会产生马赛克了
            hls_path ./m3u8File;         #切片视频文件存放位置(HLS,m3u8文件存放位置)
            hls_fragment 2s;             #每个视频切片的时长
            hls_playlist_length 16s;
            recorder myRecord{
                record all manual;
                record_suffix _.flv;
                record_path ./rec;
            }
            #hls_continuous on;          #连续模式
            #hls_cleanup on;             #对多余的切片进行删除
            #hls_nested on;              #嵌套模式
        }
    }
}


#HTTP服务
http {
    include       mime.types;
    default_type  application/octet-stream;
    sendfile        on;
    keepalive_timeout  65;

    server {
        listen       80;
        server_name  localhost;

        location / {
            root   html;
            index  index.html index.htm;
        }

        location /live_hls{
            types{
                #m3u8 type设置
                application/vnd.apple.mpegurl m3u8;
                #ts分片文件设置
                video/mp2t ts;
            }
            #指向访问m3u8文件目录
            alias ./m3u8File;
                add_header Cache-Control no-cache; #禁止缓存
                add_header Access-Control-Allow-Origin *; #允许所有域名跨域访问代理地址
                add_header Access-Control-Allow-Headers X-Requested-With;
                add_header Access-Control-Allow-Methods GET; #跨域请求访问请求方式,
        }

        location /control{
            rtmp_control all;
        }

        location /stat{
            rtmp_stat all;
            rtmp_stat_stylesheet stat.xsl;
        }
        location /stat.xsl{
            root ./nginx-rtmp-module-master;
        }


        # redirect server error pages to the static page /50x.html
        #
        error_page   500 502 503 504  /50x.html;
        location = /50x.html {
            root   html;
        }
    }
}
然后我们进行运行直播服务器,怎么运行呢。直接运行.exe是无法进行完全启动的。
我们打开cmd命令;

回车之后我们就可以打开任务管理器看到进程是已经开启了。

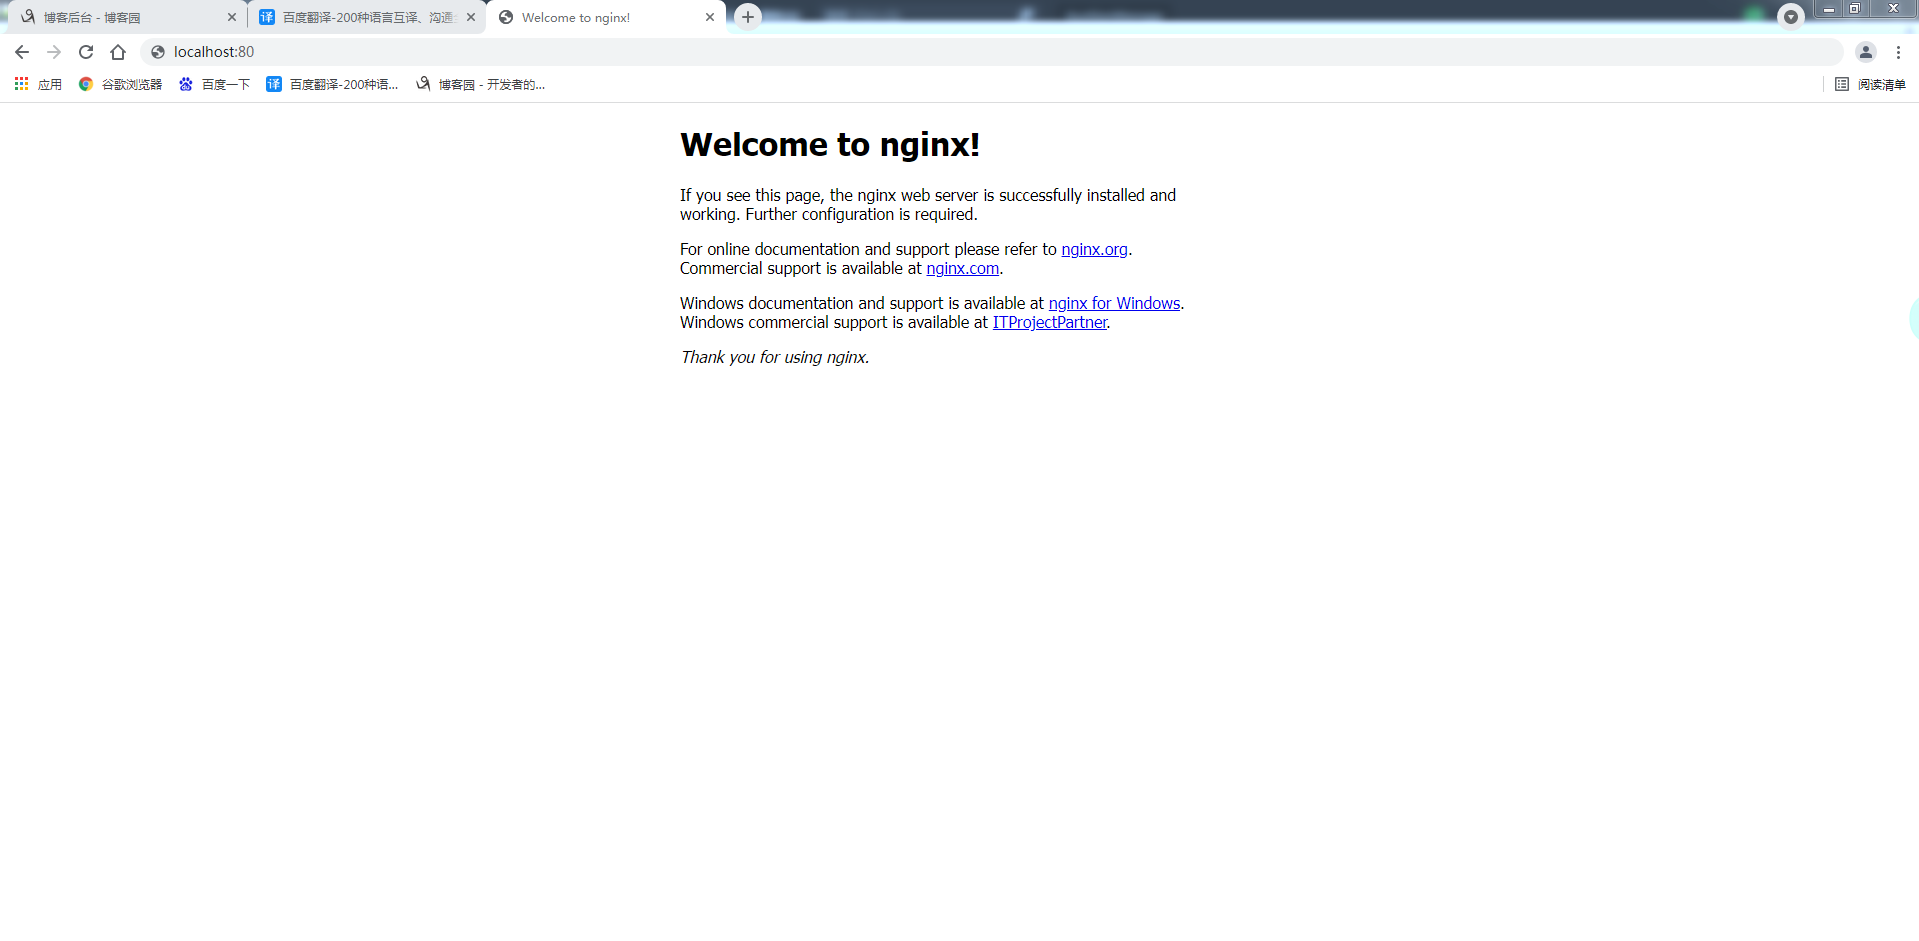
然后打开游览器地址栏中输入localhost:80,出现下面图片内容代表没有问题。
下一步我们进行obs推流 推流后可以让其他端口进行拉流播放;
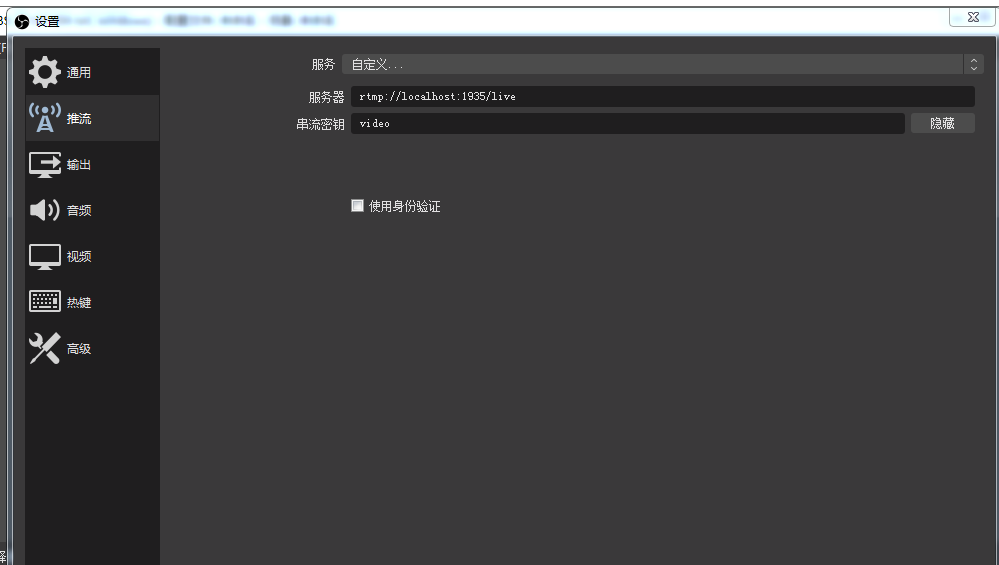
拉流的话这里提供两种方式
第一种直接原地址rtmp:进行拉流。
另外一种是推荐的http:进行拉流 格式如下:http://localhost:80/live_hls/1441970998831222784.m3u8
可以看到访问直播流是没有问题的~
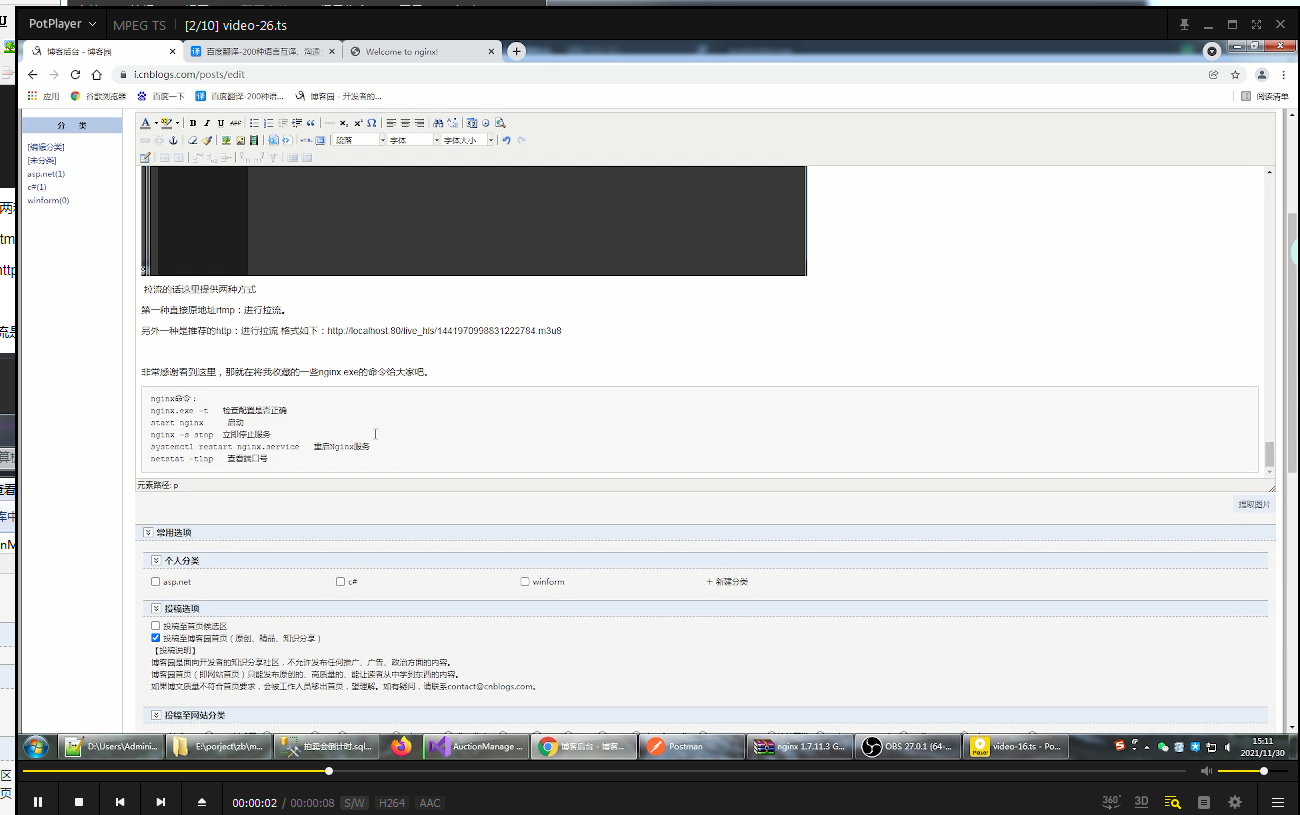
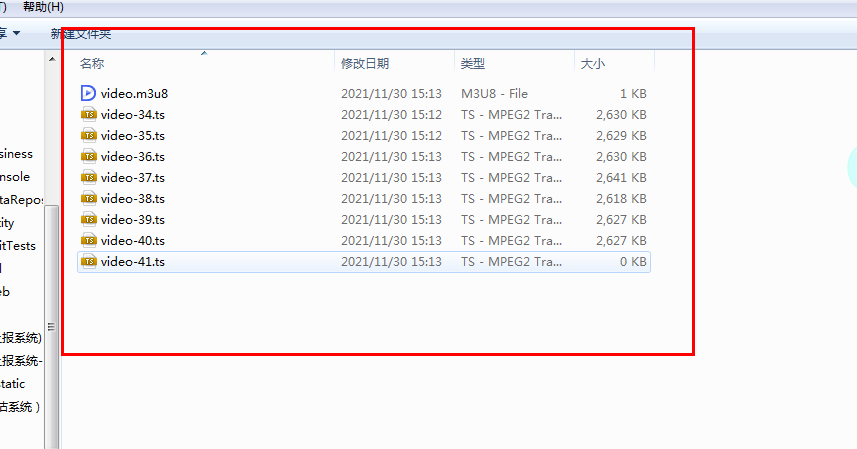
然后文件夹中也出现了我们推流的一些m3u8.文件。
非常感谢看到这里,那就在将我收藏的一些nginx.exe的命令给大家吧。
nginx命令:
nginx.exe -t   检查配置是否正确
start nginx     启动
nginx -s stop  立即停止服务
systemctl restart nginx.service   重启Nginx服务
netstat -tlnp   查看端口号
内容来源于网络如有侵权请私信删除
文章来源: 博客园
- 还没有人评论,欢迎说说您的想法!
 客服
客服


