
一、创建所需要的代码仓库
- 创建 Spec 私有索引库(ZFSpec),用来存放本地spec
- 创建模块私有库(ZFPodProject),用来存放项目工程文件
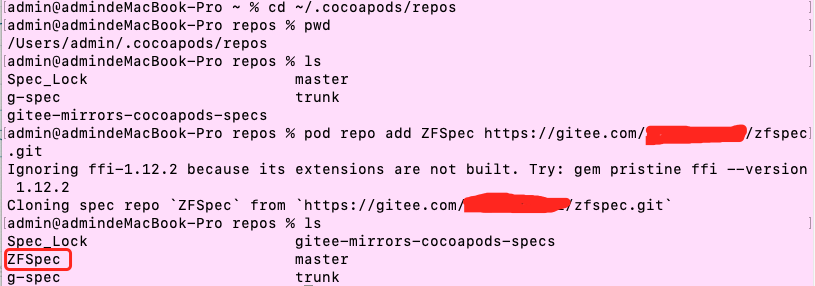
二、私有索引库添加到本地 CocoaPods
操作命令:pod repo add {私有库名字} {私有库git地址}
打开终端,执行以下命令:
# cd 到本地的 CocoaPods 仓库
cd ~/.cocoapods/repos
# 将 ZFSpec 私有库添加到本地的 CocoaPods 仓库
pod repo add ZFSpec https://gitee.com/xxx/zfspec.git
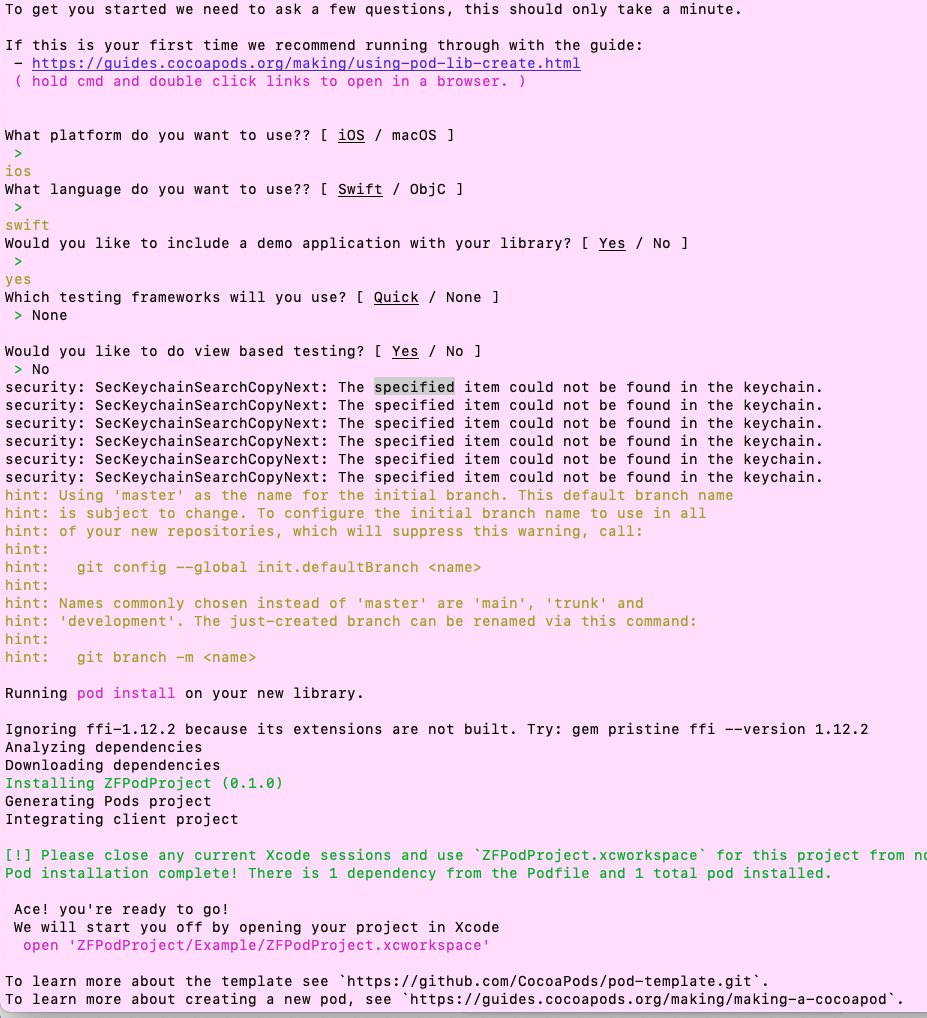
三、模块项目工程
1、创建
操作命令:pod lib create {模块名}
# cd 到可以创建的目录
cd Desktop/Module
# 创建模块项目
pod lib create ZFPodProject
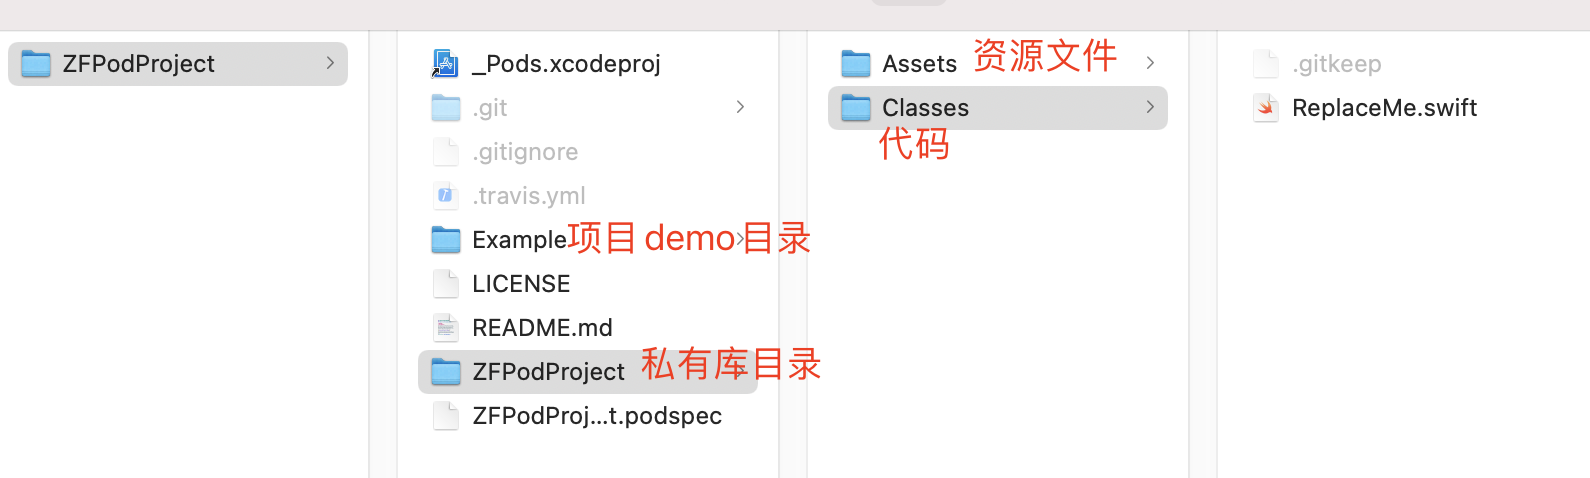
2、目录介绍
ZFPodProject
ZFPodProject(私有库目录)
Assets(资源文件存放目录)
Classes(代码文件存放目录)
Example(demo 目录)
将 Classes 文件夹中的 "ReplaceMe.swift" 文件删除,然后将自己所需要的代码文件放到这个目录下;将资源文件(图片,xib文件...)放到 Assets 文件夹下,如图:
3、代码导入
cd 到 Example 文件下,然后pod install,更新 Example 项目的 pod
打开 Example 项目,Pod 下的 Development Pods 文件夹就是私有库代码
四、podspec 文件配置
1、修改 podspec 文件
语法参考网站:https://guides.cocoapods.org/syntax/podspec.html
podspec 文件注释
Pod::Spec.new do |s|
# 项目名称
  s.name             = 'ZFPodProject'
# 版本号
  s.version          = '0.1.0'
# 项目摘要
  s.summary          = 'A short description of GOOCR.'

# This description is used to generate tags and improve search results.
#   * Think: What does it do? Why did you write it? What is the focus?
#   * Try to keep it short, snappy and to the point.
#   * Write the description between the DESC delimiters below.
#   * Finally, don't worry about the indent, CocoaPods strips it!
# 项目描述
  s.description      = <<-DESC
  GOOCR的项目描述,这是G1项目个人私有库
                       DESC
# 主页,这里要填写可以访问到的地址,不然验证不通过
  s.homepage         = 'https://www.baidu.com'
  # s.screenshots     = 'www.example.com/screenshots_1', 'www.example.com/screenshots_2'
  s.license          = { :type => 'MIT', :file => 'LICENSE' }
# 作者
  s.author           = { 'Zephyr' => '2049982764@qq.com' }
# 项目地址,这里不建议使用ssh地址,会有警告,建议使用http和https,最好是https
# 更改成自己的项目远程仓库地址
  s.source           = { :git => 'https://gitee.com/ZF_AloneOwl/zfpod-project.git', :tag => s.version.to_s }
  # s.social_media_url = 'https://twitter.com/<TWITTER_USERNAME>'

  s.ios.deployment_target = '11.0'

  # 源码
  s.source_files = 'ZFPodProject/Classes/**/*'

  # 资源文件
  s.resource_bundles = {
    'ZFPodProject' => [
      'ZFPodProject/Assets/*.png',
      'ZFPodProject/Assets/*.ttf'
    ]
  }

  # swift 版本
  s.swift_versions=['5']
# s.frameworks和s.dependency根据是否有依赖库来决定是否需要添加
# 依赖的frameworks
  s.frameworks = 'UIKit', 'AVKit', 'Foundation'
# 依赖的公开库或私有库,如有多个,可以重复声明
  s.dependency 'Alamofire','~> 5.2.2'
  s.dependency 'Moya','~> 14.0.0'
end
注:项目中的 Podfile 文件中默认 iOS 版本是 9.0(
platform :ios, '9.0'),需要和 podspec 中设置的一致(s.ios.deployment_target = '11.0'),我这里需要将 Podfile 中的修改为 11.0。这里不修改,在 pod install 时可能会报错。
五、验证及上传
1、验证本地 podspec 文件有效性
验证有效性花费时间较长,建议先构建 demo,demo 中没有报错后,再进行验证
操作命令:pod lib lint [操作参数]
参数说明:
# 指定源,比如你的私有pod同时依赖了公有库和私有库,你必须指定源才行,因为默认只会去在公有源中查找对应的依赖
--sources='私有库地址,公有库地址'
# 显示详情
--verbose
# 当构建当前私有库时使用静态库的情况下使用
--use-libraries
# 跳过验证 pod 是否可以导入阶段
--skip-import-validation
# 允许警告
--allow-warnings
示例:
pod lib lint --sources='https://gitee.com/ZF_AloneOwl/zfspec.git,https://github.com/CocoaPods/Specs.git' --verbose --use-libraries --skip-import-validation --allow-warnings
注:以上参数不一定全部使用,是项目情况使用
2、本地项目文件上传到远程仓库中
# 查看远程仓库地址
git remote -v
# 将本地项目与远程仓库相关联:
git remote add origin {远程仓库地址}
# 修改远程地址
git remote set-url origin {远程仓库地址}
# 拉取远端代码
git pull origin master --allow-unrelated-histories

git status
git add .
git commit -m '提交消息'
git status
git pull origin master
git push origin master
# tag 要与podspec文件中的版本号一致
git tag -a 0.1.0 -m '提交消息'
git push —tags
git tag
3、podspec 文件本地和远程有效性的验证
操作命令:pod spec lint [操作参数]
pod spec lint --verbose --allow-warnings
注:操作参数见选项2
4、向私有 spec Repo 远程仓库中提交 podspec
操作命令:pod repo push {仓库名} {项目名}.podspec [操作参数]
pod repo push ZFSpec ZFPodProject.podspec --verbose --allow-warnings
注:操作参数见选项2
5、上传成功验证
完成以上步骤,就表示已经创建了一个 CocoaPods 私有库
前往文件夹 ~/.cocoapods/repos 去查看 ZFSpec 目录下的文件如下:
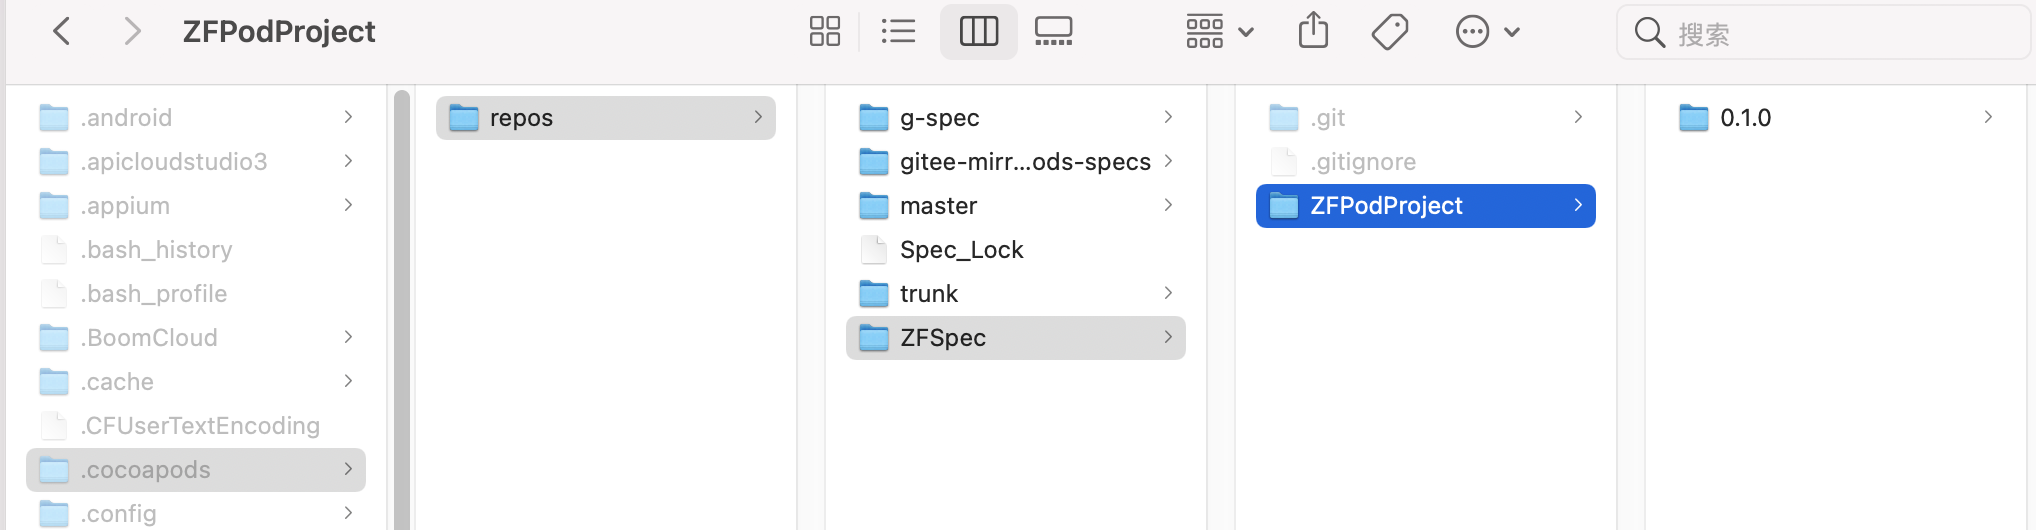
.cocoapods 属于隐藏文件夹
Mac 显示隐藏文件夹快捷键:command + shift + .
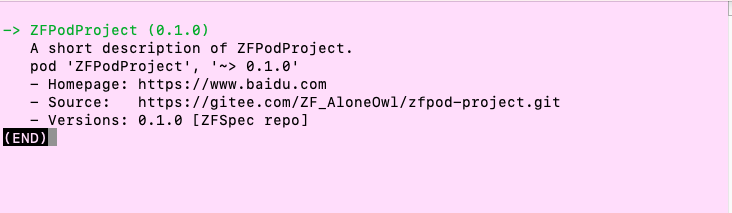
使用 pod search ZFPodProject 进行搜索,结果如下就表示 ZFPodProject 可以正常使用了
pod search xxx 报错
Ignoring ffi-1.12.2 because its extensions are not built. Try: gem pristine ffi --version 1.12.2
Creating search index for spec repo 'ZFSpec'.. Done!

[!] CDN: trunk - Cannot perform full-text search because Algolia returned an error: 0: Cannot reach any host: execution expired, execution expired, execution expired, execution expired
解决办法:终端执行 pod repo remove trunk 移除 trunk 源
六、CocoaPods 私有库使用
在使用私有库时,必须在 Podfile 文件中使用 source 指定私有库源
# Uncomment the next line to define a global platform for your project
platform :ios, '11.0'

inhibit_all_warnings!

# 私有源
source 'https://gitee.com/ZF_AloneOwl/zfspec.git'

# 若还需要使用其他三方库,如 Moya 等,需要指定一个共有源
source 'https://gitee.com/mirrors/CocoaPods-Specs.git'

target 'PodDemo' do
  # Comment the next line if you don't want to use dynamic frameworks
  use_frameworks!

  pod 'ZFPodProject'

  pod 'Moya'

end
参考文章:
CocoaPods搭建私有库
CocoaPods使用
pod install无响应等CDN: trunk - Cannot perform full-text search because Algolia returned an error: 0: Ca
文章来源: 博客园
- 还没有人评论,欢迎说说您的想法!
 客服
客服


