
大家知道,在开发大型vue项目时,使用vuex时不可避免的,vuex能够帮助我们在错综复杂的数据流中快速拿到自己想要的数据,提高开发效率,尽管vuex无法持久化数据,但也可以通过插件来解决该问题,总之vuex是大型项目中百利无一害的插件。
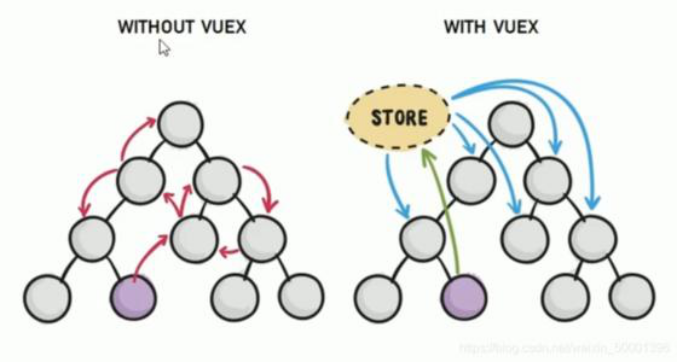
在上文我们实现了一个vue-router后,我们现在就来实现一个vuex,首先我们从vuex的原理图入手:

从原理图我们可以看出,$store实例通过dispatch调用actions里的异步方法,通过commit调用mutations里的同步方法,并只能通过mutations改变state(这里插一句:非严格模式下是可以通过commit以外的方式改变state里的状态的,但在严格模式下,Vuex中修改state的唯一渠道就是执行 commit('xx', payload) 方法,其底层通过执行 this._withCommit(fn) 设置_committing标志变量为true,然后才能修改state,修改完毕还需要还原_committing变量。外部修改虽然能够直接修改state,但是并没有修改_committing标志位,所以只要watch一下state,state change时判断是否_committing值为true,即可判断修改的合法性,在严格模式下,任何 mutation 处理函数以外修改 Vuex state 都会抛出错误。)然后getters能够及时获取state中的状态并作出计算(实际上getters就是一个计算属性)
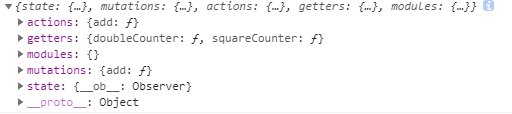
接下来我们来简单做一个vuex的小demo,看看vuex到底实现了哪些功能:
我们在store文件的index.js中这样写:
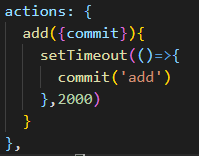
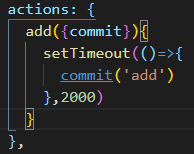
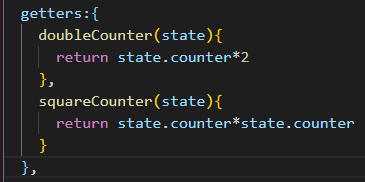
import Vue from 'vue'
import Vuex from 'vuex'

Vue.use(Vuex)

export default new Vuex.Store({
  state: {
    counter:0
  },
  mutations: {
//同步自加的方法
    add(state){
      state.counter++
    }
  },
  actions: {
//异步自加的方法
    add({commit}){
      setTimeout(()=>{
        commit('add')
      },2000)
    }
  },
  getters:{
//获取乘二的值
    doubleCounter(state){
      return state.counter*2
},
//获取平方值
    squareCounter(state){
      return state.counter*state.counter
    }
  },
  modules: {
  }
})
在Home组件中这样写:
<template>
  <div class="hello">
    <button @click="$store.commit('add')">counter:{{$store.state.counter}}</button>
    <button @click="$store.dispatch('add')">async counter:{{$store.state.counter}}</button>
    <p>double counter:{{$store.getters.doubleCounter}}</p>
    <p>squareCounter:{{$store.getters.squareCounter}}</p>
   <h2>这是一个Home组件</h2>
   <p>我叫rick,欢迎来看我的文章:从0实现一个vuex</p>
  </div>
</template>
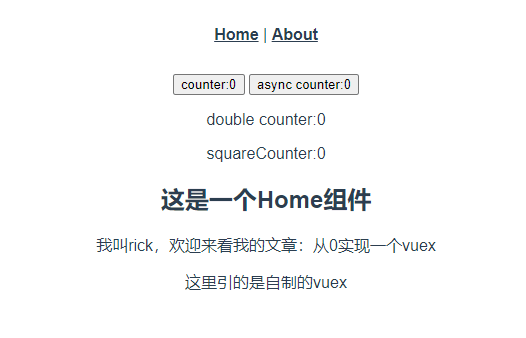
那么我们的页面大致长这样:
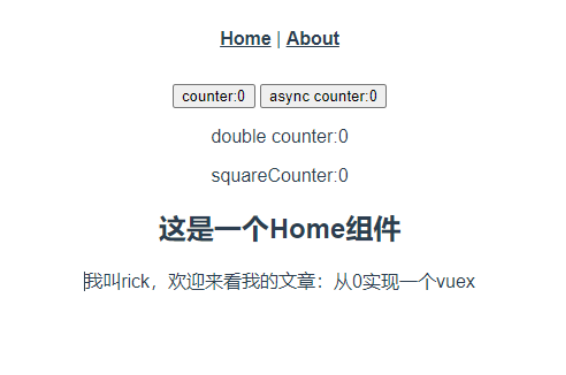
点击counter可以自加,点击async counter可以延迟两秒自加,double counter读出双倍的数值,squareCounter读出平方数值
接下来我们把引入的vuex换成自己自制的vuex,来继续实现现有的这些功能:
import Vuex from './kvuex'
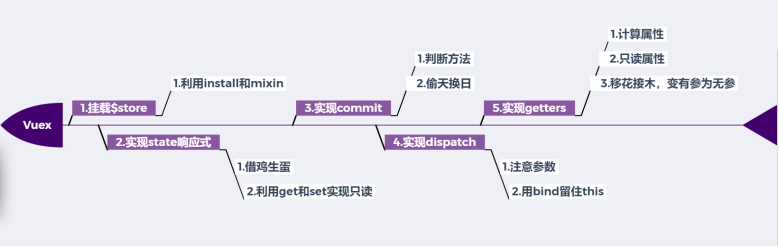
那么熟悉了原理图,设计了一个简易的vuex功能示例,接下就要来要实现我们自己的vuex啦,我们大致按照如下思路进行:
1. 首先在$store上挂载dispatch,state,getters,commmit等方法是肯定的
2. 其次要实现state的响应式,即state改变,依赖于state的所有属性都要能实现自动渲染
3. 接着实现commit和dispatch的内部方法,即为什么每次commit或dispatch都能自动调用相关的方法
4. 最后实现getters,要注意为什么这个getters能够实现只读的以及它的内部如何实现计算属性
做一个鱼骨图方便大家理解:接下来我们来逐步实现每个细节
1. 挂载$store
1.1 利用install和mixin
大家还记得我在实现vue-router那篇文章中的方法吗?此处我建议大家先看比较简单的vue-router的实现原理再看这篇文章哦~(见我的文章:https://www.cnblogs.com/funkyou/p/14580129.html)
我们故技重施,依然利用开发插件的方式,老规矩,复习一下vue文档:
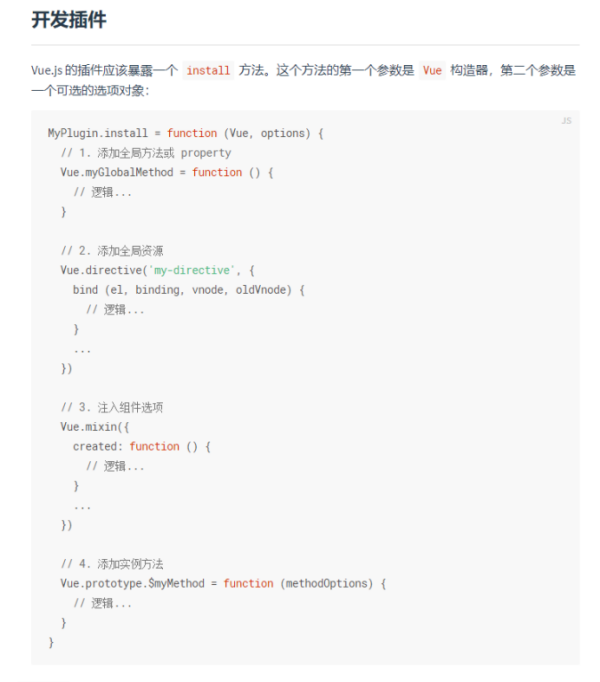
为了能让所有vue组件都能通过this.$store.xxx访问到state,mutations等,那么我们就要通过全局混入的方式为vue原型上挂载一个$store的属性,全局混入用法见文档:

实现代码如下:
// use调用时会传入Vue
function install(_Vue){
  // 保存Vue构造函数,插件中使用
  Vue=_Vue

  Vue.mixin({
    beforeCreate() {
      // 判断当前options选项是否含有store
      if(this.$options.store){
        // 如果含有就在原型上挂载这个store实例
        Vue.prototype.$store=this.$options.store
      }
    },
  })
}
// 因为index.js是通过Vuex接收的,所以我们要这样暴露出去(实际上Vuex={Store,install,xxx})
export default{Store,install}
2. 实现state响应式
2.1:借鸡生蛋
首先我们构造一个Store实例:
class Store{
   constructor(options){

   }
}
其实这个options就是store中的配置项:
我们要想实现store中的数据响应式,能否借助现成的能实现响应式的示例来“借鸡生蛋”呢?(Vue实例此时瑟瑟发抖,并大喊你不要过来呀~)没错,Vue,就是你了,我们new 一个Vue实例,把data存放进去,这样我们的数据就能自动被Vue的defineProperty追踪并设置set和get属性,即可实现响应式:
     // data响应式处理
   this._vm= new Vue({
     data:{
    //把state藏进$$state中
       $$state:options.state
     }
  })
2.2: 利用get和set实现只读
我们希望我们的state是不能通过mutations以外的任何方式修改的,即实现只读,那么可以利用get和set属性对state进行设置:
  // 存取器,store.state
  get state(){
    console.log(this._vm);
    return this._vm._data.$$state
  }
  set state(v){
    console.error('你无法设置state的值')
  }
3.实现commit
3.1判断方法
我们要从mutations中判断出当前要用的是哪个方法,并在commit内部执行这个方法,传入state的参数,但注意要在错综复杂的this环境中先把宝贵的options.mutations保存起来:
    //  保存mutations
    this._mutations=options.mutations
    // 保存actions
    this._actions=options.actions
    // 保存getters
    this._getters=options.getters
3.2偷天换日
这里我们想用的是commit(type,payload)中的type对应的方法,那么我们能否先把这个mutations[type]方法拷贝给一个函数,再在commit方法内部执行这个函数呢?答案是可行的,这就是一种偷天换日的函数复用思想:
 commit(type,payload){
    // 借用mutations[type]方法
   const entry= this._mutations[type]
   if(!entry){
     console.error('unknown mutation type');
   }
  //  执行这个mutations[type]方法并传入state参数
   entry(this.state,payload)
  }
4. 实现dispatch
4.1注意参数
此处实现dispatch和mutations大致相同,但要注意actions和mutations中传入参数的不同:
mutations中:

actions中:
显然这里entry要传入的是store实例,在constructer中用this代指:
 dispatch(type,payload){
    const entry=this._actions[type]
    if(!entry){
      console.error('unknow action type')
    }
    entry(this,payload)
  }
4.2用bind留住this
但注意,此时commit内部的this还是不是我想要设置的那个store实例了?看demo:
此时的this已经完全乱套了,所以我们还需要在commit中留住this,让他执行的永远是store实例,直接写:
 //这样commit和dispatch内部的this就是当前上下文中的this,即store实例
   this.commit= this.commit.bind(this)
   this.dispatch= this.dispatch.bind(this)
5. 实现getters
5.1计算属性
要想实现一个只读的getters,此处我们依然选择在Vue实例中设置这个computed方法:
  // 定义computed选项和getters
    const computed={}
    this.getters={}

this._vm= new Vue({
    data:{
      $$state:options.state
    },
    computed
  })
5.2只读属性
此处我们先保存store,随后为这个getters设置只读属性,我们可以用Object.defineProperty方法让我们能通过get读到这个方法
5.3移花接木,变无参为有参
接下来,我们想借用getters里的方法并传入state参数,但是注意:我们的getters方法是有参数的:
那么我们可以通过Object.key拿到每个方法的索引,再用一个fn保存当前索引下的方法,再在fn里传入state参数,如下:
   // 保存store
    const store=this
    // 遍历拿到索引key,并通过store._getters[key]找到这个方法
    Object.keys(this._getters).forEach(key=>{
      // 获取用户定义的getter
      const fn =store._getters[key]
      // 转换为computed可以使用无参数形式
      computed[key]=function(){
        return fn(store.state)
      }
      // 为getters定义只读属性
      Object.defineProperty(store.getters,key,{
        get:()=> store._vm[key]
      })
    })
此时我们打印这个fn,它即是:

或者

即getters中的方法,我们调用了它并完美的把state传了进去,这个方法是不是让人拍案叫绝~
接下来是全部源码:
//1.插件:挂载$store
// 2.实现Store
let Vue  //保存Vue构造函数,插件中使用

class Store{
  constructor(options){
   console.log(options);
    //  保存mutations
    this._mutations=options.mutations
    // 保存actions
    this._actions=options.actions
    // 保存getters
    this._getters=options.getters

    // 定义computed选项和getters
    const computed={}
    this.getters={}

    // 保存store
    const store=this
    // 遍历拿到索引key,并通过store._getters[key]找到这个方法
    Object.keys(this._getters).forEach(key=>{
      // 获取用户定义的getter
      const fn =store._getters[key]
      // 转换为computed可以使用无参数形式
      computed[key]=function(){
        console.log(fn);
        return fn(store.state)
      }
      // 为getters定义只读属性
      Object.defineProperty(store.getters,key,{
        get:()=> store._vm[key]
      })
    })
     // data响应式处理
   this._vm= new Vue({
    data:{
      $$state:options.state
    },
    computed
  })
    //这样commit和dispatch内部的this就是当前上下文中的this,即store实例
   this.commit= this.commit.bind(this)
   this.dispatch= this.dispatch.bind(this)
  }
  // 存取器,store.state
  get state(){
    console.log(this._vm);
    return this._vm._data.$$state
  }
  set state(v){
    console.error('can not set')
  }
  commit(type,payload){
    // 借用mutations[type]方法
   const entry= this._mutations[type]
   if(!entry){
     console.error('unknown mutation type');
   }
  //  执行这个mutations[type]方法并传入state参数
   entry(this.state,payload)
  }
  dispatch(type,payload){
    const entry=this._actions[type]
    if(!entry){
      console.error('unknow action type')
    }
    entry(this,payload)
  }
}
// use调用时会传入Vue
function install(_Vue){
  // 保存Vue构造函数,插件中使用
  Vue=_Vue
  Vue.mixin({
    beforeCreate() {
      // 判断当前options选项是否含有store
      if(this.$options.store){
        // 如果含有就在原型上挂载这个store实例
        Vue.prototype.$store=this.$options.store
      }
    },
  })
}
// 因为index.js是通过Vuex接收的,所以我们要这样暴露出去(实际上Vuex={Store,install,xxx})
export default{Store,install}
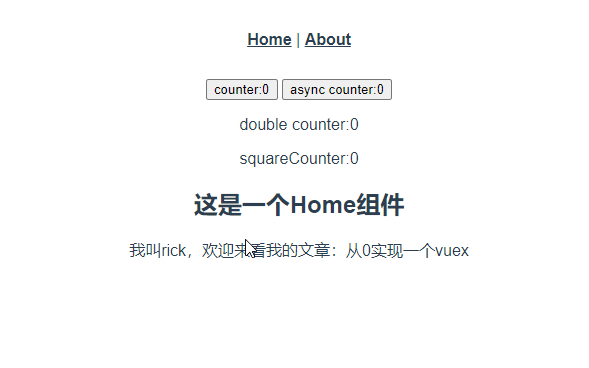
最后看下效果:
完美实现~!如果大家想和我一起学习前端交流心得指点江山,欢迎加我的vx:shq173392531
文章来源: 博客园
- 还没有人评论,欢迎说说您的想法!


 客服
客服


