现在开发主要使用微服务框架springboot,在springboot中经常遇到读取application.yml文件的情形。
一、概述
开发过程中经常遇到要读取application.yml文件中的属性值,本文总结几种读取的方式,供参考。
二、详述
我这里使用的是springboot-2.1.2.RELEASE版本,这里使用的是application.properties的配置方式,和使用application.yml的方式是一样的。下面是application.properties文件的内容
cn.com.my.test1=test1
cn.com.my.test2=test2
1、@Value注解
这种方式是spring最早提供的方式,通过@Value注解的方式,该注解用在属性上,但是要求该属性所在的类必须要被spring管理。
package com.example.demo.controller;

import org.springframework.beans.factory.annotation.Value;
import org.springframework.stereotype.Controller;
import org.springframework.web.bind.annotation.RequestMapping;
import org.springframework.web.bind.annotation.ResponseBody;

@Controller
public class TestController {

    @Value("${cn.com.my.test1}")
    private String test1;
    @Value("${cn.com.my.test2}")
    private String test2;

    @RequestMapping("/test1/test")
    @ResponseBody
    public String getTest(){
        return "hello:"+test1+",test2:"+test2;
    }

}
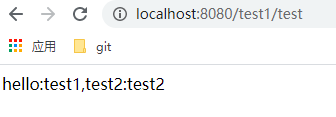
在标记有@Controller类中使用了带有@Value注解的test1和test2的属性,首先标记有@Controller注解便可以使该类被spring管理。其次,使用@Value标记了属性,则可以获得application.properties(application.yml)文件中的属性,这里使用${cn.com.my.test1},属性的名称必须是全部的名称,测试结果如下,

2、@ConfigurationProperties
@ConfigurationProperties注解是springboot提供的,在springboot中大量使用,下面看其用法,
使用@Component注解
这里需要定义一个类,
package com.example.demo.properties;

import org.springframework.boot.context.properties.ConfigurationProperties;
import org.springframework.stereotype.Component;

@Component
@ConfigurationProperties(prefix = "cn.com.my")
public class ApplicationPro {
    private String test1;
    private String test2;
    private String testName;

    //必须有set方法
    public void setTest1(String test1) {
        this.test1 = test1;
    }

    //必须有set方法
    public void setTest2(String test2) {
        this.test2 = test2;
    }

    public String getTest1() {
        return test1;
    }

    public String getTest2() {
        return test2;
    }
public void setTestName(String testName) {
    this.testName = testName;
}

public String getTestName() {
    return testName;
}
}
该类上使用了@ConfigurationProperties注解,且配置了prefix属性,指定了要获取属性的前缀,这里的前缀是cn.com.my,在类中定义的属性名最好和application.properties文件中的一致,不过这种方式可以采用稀疏匹配,把application.properties修改为下面的内容,
cn.com.my.test1=test1
cn.com.my.test2=test2
cn.com.my.test-name="hello world"
另外,在ApplicationPro类上标记有@Component注解,标记该注解的意思是要把该类交给spring管理,也就是说要让spring管理此类,其实也可以使用其他注解,如,@Service等
下面看测试类,
package com.example.demo.controller;

import com.example.demo.properties.ApplicationPro;
import org.springframework.beans.factory.annotation.Autowired;
import org.springframework.stereotype.Controller;
import org.springframework.web.bind.annotation.RequestMapping;
import org.springframework.web.bind.annotation.ResponseBody;

@Controller
public class TestController3 {
    @Autowired
    private ApplicationPro ap;
    @RequestMapping("test3/test")
    @ResponseBody
    public String getTest(){
        return ap.getTest1()+","+ap.getTest2()+","+ap.getTestName();
    }
}
看测试结果,

从上面的结果可以看出已经获得了application.properties文件中的值,并且获得了test-name的值。具体匹配规则可以自行百度,这里强烈建议配置文件中的属性和类中的保持一致。
使用@EnableConfigurationProperties注解
使用该注解在ApplicationPro类中便不需要使用@Component注解,
package com.example.demo.properties;

import org.springframework.boot.context.properties.ConfigurationProperties;
import org.springframework.stereotype.Component;

//@Component
@ConfigurationProperties(prefix = "cn.com.my")
public class ApplicationPro {
    private String test1;
    private String test2;
    private String testName;

    //必须有set方法
    public void setTest1(String test1) {
        this.test1 = test1;
    }

    //必须有set方法
    public void setTest2(String test2) {
        this.test2 = test2;
    }

    public String getTest1() {
        return test1;
    }

    public String getTest2() {
        return test2;
    }

    public void setTestName(String testName) {
        this.testName = testName;
    }

    public String getTestName() {
        return testName;
    }
}
再看启动类,在启动类上标记了@EnableConfigurationProperties({ApplicationPro.class}),也就是使@ConfigurationProperties注解生效,并标记了标有@ConfigurationProperties注解的类Application.class
package com.example.demo;

import com.example.demo.properties.ApplicationPro;
import org.springframework.boot.SpringApplication;
import org.springframework.boot.autoconfigure.SpringBootApplication;
import org.springframework.boot.context.properties.ConfigurationProperties;
import org.springframework.boot.context.properties.EnableConfigurationProperties;

@SpringBootApplication
@EnableConfigurationProperties({ApplicationPro.class})
public class DemoApplication {

    public static void main(String[] args) {
        SpringApplication.run(DemoApplication.class, args);
    }

}
下面看测试结果,

3、Environment对象
使用Environment对象,该对象是spring提供的一个对象,且是spring内部创建的对象,
package com.example.demo.controller;

import org.springframework.beans.factory.annotation.Autowired;
import org.springframework.core.env.Environment;
import org.springframework.stereotype.Controller;
import org.springframework.web.bind.annotation.RequestMapping;
import org.springframework.web.bind.annotation.ResponseBody;

@Controller
public class TestController2 {
    @Autowired
    private Environment environment;

    @RequestMapping("/test2/test")
    @ResponseBody
    public String getTest(){
        return "hello,"+environment.getProperty("cn.com.my.test1")+","+"test2:"+environment.getProperty("cn.com.my.test2");
    }
}
可以看到,可以直接注入该对象的实例,通过其getProperty方法获得相应的属性值。
三、总结
本文总结了,在使用springboot的过程中获取配置文件中的几种方式,
@Value
@ConfigurationProperties
Environment对象

有不当之处,欢迎指正,谢谢。
文章来源: 博客园
- 还没有人评论,欢迎说说您的想法!


 客服
客服


