# 当我们想要体验体验不同类型的Linux的使用技巧,节省个人开销,可以在Windows系统上创建其他系统的虚拟机,可以创建虚拟机常用的应用有:
- VMware Station
- VirtualBox
此篇文章使用VirtualBox,结合Vagrant来实现Linux虚拟机的创建。使用这两种应用结合的方法,相对于使用VMware Station创建虚拟机来可以节省时间,加快效率,减少了等待系统安装的漫长等待。
涉及的应用:Vagrant 下载路径:Install | Vagrant | HashiCorp Developer
VirtualBox 下载路径:Downloads – Oracle VM VirtualBox
一. Vagrant+VirtualBox安装
下载Vagrant和VirtualBox完成后,安装两个应用。由于VirtualBox和Vagrant的安装过程均是图形化界面安装,直接下一步,安装路径可以自行选择(记住自己选的路径),安装顺序没有前后顺序,安装完成后可以检查以下:
(1)在Windows系统下,使用快捷键“Win + R”打开运行窗口,在其中输入“cmd”,在命令行窗口中输入vagrant ,如下:
C:UsersAdministrator>vagrant
Usage: vagrant [options] <command> [<args>]

    -h, --help                       Print this help.

Common commands:
     autocomplete    manages autocomplete installation on host
     box             manages boxes: installation, removal, etc.
     cloud           manages everything related to Vagrant Cloud
     destroy         stops and deletes all traces of the vagrant machine
     global-status   outputs status Vagrant environments for this user
     halt            stops the vagrant machine
     help            shows the help for a subcommand
     init            initializes a new Vagrant environment by creating a Vagrantfile
     login
     package         packages a running vagrant environment into a box
     plugin          manages plugins: install, uninstall, update, etc.
     port            displays information about guest port mappings
     powershell      connects to machine via powershell remoting
     provision       provisions the vagrant machine
     push            deploys code in this environment to a configured destination
     rdp             connects to machine via RDP
     reload          restarts vagrant machine, loads new Vagrantfile configuration
     resume          resume a suspended vagrant machine
     serve           start Vagrant server
     snapshot        manages snapshots: saving, restoring, etc.
     ssh             connects to machine via SSH
     ssh-config      outputs OpenSSH valid configuration to connect to the machine
     status          outputs status of the vagrant machine
     suspend         suspends the machine
     up              starts and provisions the vagrant environment
     upload          upload to machine via communicator
     validate        validates the Vagrantfile
     version         prints current and latest Vagrant version
     winrm           executes commands on a machine via WinRM
     winrm-config    outputs WinRM configuration to connect to the machine

For help on any individual command run `vagrant COMMAND -h`

Additional subcommands are available, but are either more advanced
or not commonly used. To see all subcommands, run the command
`vagrant list-commands`.
        --[no-]color                 Enable or disable color output
        --machine-readable           Enable machine readable output
    -v, --version                    Display Vagrant version
        --debug                      Enable debug output
        --timestamp                  Enable timestamps on log output
        --debug-timestamp            Enable debug output with timestamps
        --no-tty                     Enable non-interactive output

C:UsersAdministrator>
出现如上的内容,表示Vagrant安装成功!
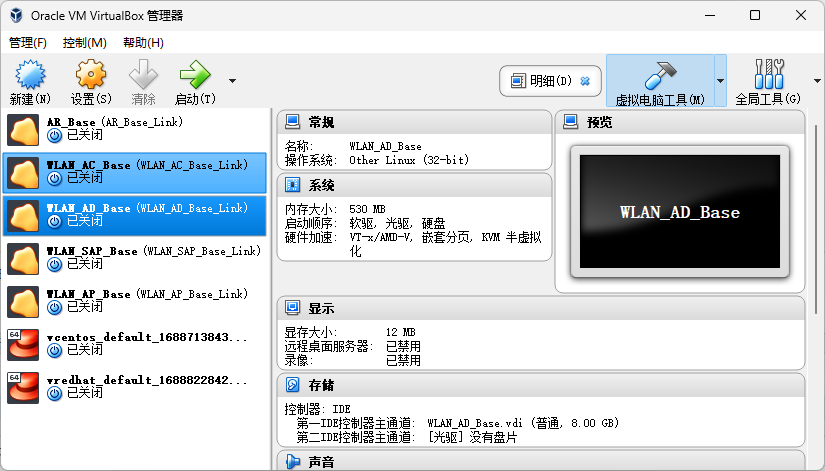
(2)VirtualBox安装完成后,会是一个普通的应用程序,直接点击对应图标打开,就是如下的界面(应用刚安装,无以下的虚拟系统列表):

到此,VirtualBox安装完成。
二. Linux虚拟机安装
现在,使用现有的环境,创建一个版本为 Centos 7 的虚拟机,安装开始。
(1)在Windows系统下,使用快捷键“Win + R”打开运行窗口,在其中输入“cmd”,打开命令行窗口,输入如下内容:
在windows的F盘下创建一个虚拟机总目录:F:vrbox
C:UsersAdministrator>F:

F:>mkdir vrbox
F:>dir
驱动器 F 中的卷没有标签。
F: 的目录
2023/08/01 22:21 <DIR> vrbox
0 个文件 0 字节
1 个目录 92,429,574,144 可用字节
在F:vrbox的路径下,创建Centos 7 虚拟机的文件目录:F:vrboxvcentos:
F:vrbox>mkdir vcentos

F:vrbox>cd vcentos

F:vrboxvcentos>
(2) 在F:vrboxvcentos目录下打开命令行窗口,输入如下命令:
下载创建虚拟机:
F:vrboxvcentos>vagrant init centos/7
执行结果,如下图;

(3) 启动创建的虚拟机
启动虚拟机:vagrant up
(此处需要注意:当初次执行vagrant up命令时,由于需要从vagrant的 Discover Vagrant Boxes - Vagrant Cloud (vagrantup.com) 网站中下载Centos虚拟机使用的系统镜像,需要稍等一会,这个等待时间相对于之间下载系统镜像(.iso)文件来说可以忽略,下载完成后会自动完成安装)
F:vrboxvcentos>vagrant up
Bringing machine 'default' up with 'virtualbox' provider...
==> default: Checking if box 'centos/7' version '2004.01' is up to date...
==> default: Clearing any previously set forwarded ports...
==> default: Clearing any previously set network interfaces...
==> default: Preparing network interfaces based on configuration...
    default: Adapter 1: nat
    default: Adapter 2: hostonly
==> default: Forwarding ports...
    default: 22 (guest) => 2222 (host) (adapter 1)
==> default: Booting VM...
==> default: Waiting for machine to boot. This may take a few minutes...
    default: SSH address: 127.0.0.1:2222
    default: SSH username: vagrant
    default: SSH auth method: private key
==> default: Machine booted and ready!
==> default: Checking for guest additions in VM...
    default: No guest additions were detected on the base box for this VM! Guest
    default: additions are required for forwarded ports, shared folders, host only
    default: networking, and more. If SSH fails on this machine, please install
    default: the guest additions and repackage the box to continue.
    default:
    default: This is not an error message; everything may continue to work properly,
    default: in which case you may ignore this message.
==> default: Configuring and enabling network interfaces...
==> default: Rsyncing folder: /cygdrive/f/vrbox/vcentos/ => /vagrant
==> default: Machine already provisioned. Run `vagrant provision` or use the `--provision`
==> default: flag to force provisioning. Provisioners marked to run always will still run.
(4)远程连接虚拟机。
安装完成后,执行命令,连接虚拟机。
F:vrboxvcentos>vagrant ssh
Last login: Mon Jul 24 14:16:36 2023 from 10.0.2.2
使用以上命令可以直接连接虚拟机,不需要输入密码。虚拟机的默认用户及密码在“启动虚拟机”出现的命令提示中显示出来了:
==> default: Waiting for machine to boot. This may take a few minutes...
    default: SSH address: 127.0.0.1:2222
    default: SSH username: vagrant
    default: SSH auth method: private key
默认用户:vagrant 密码: vagrant
若需要使用root用户,可以在命令行执行如下命令:
[vagrant@localhost ~]$ id
uid=1000(vagrant) gid=1000(vagrant) groups=1000(vagrant) context=unconfined_u:unconfined_r:unconfined_t:s0-s0:c0.c1023
[vagrant@localhost ~]$ sudo -i
[root@localhost ~]# id
uid=0(root) gid=0(root) groups=0(root) context=unconfined_u:unconfined_r:unconfined_t:s0-s0:c0.c1023
[root@localhost ~]#
退出root用户,输入如下命令:
[root@localhost ~]# exit
logout
[vagrant@localhost ~]$ id
uid=1000(vagrant) gid=1000(vagrant) groups=1000(vagrant) context=unconfined_u:unconfined_r:unconfined_t:s0-s0:c0.c1023
[vagrant@localhost ~]$
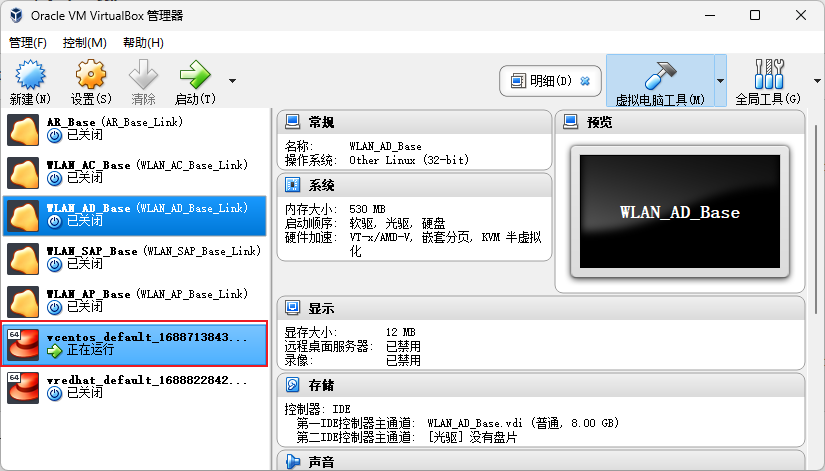
打开VirtualBox应用的虚拟机列表中,也可以看到此设备:

到此,一台为Centos 7的虚拟机就已经安装完成了。此虚拟机没有图形化界面,只有命令行界面。若需要图形化界面,可以使用相关命令进行添加。
相关命令:
##关闭虚拟机,需使用root权限
[vagrant@localhost ~]$ sudo -i
[root@localhost ~]# poweroff
Connection to 127.0.0.1 closed by remote host.
Connection to 127.0.0.1 closed.
文章来源: 博客园
- 还没有人评论,欢迎说说您的想法!


 客服
客服


